
Dark Tales: Edgar Allan Poe's The Gold Bug: Chapter Two: Exploring the Town Square
Our Dark Tales: Edgar Allan Poe's The Gold Bug Walkthrough is the perfect detective's dossier on helping you locate the lost treasure of Captain Kidd and sooth LeGrand's biting obsession. In this Dark Tales Walkthrough, you'll find a treasure trove of vital information including custom screenshots, solutions to mini-games and puzzles, as well as detailed instructions to help you crack the code on this classic twist of the famed short story by Edgar Allan Poe.
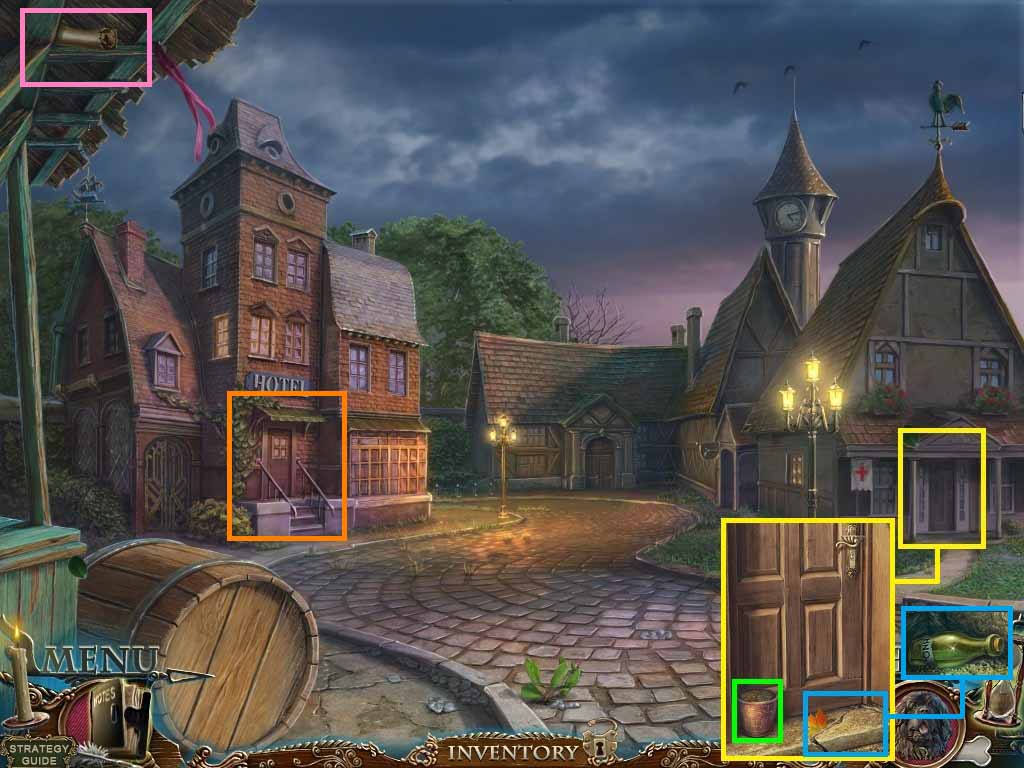
- Zoom into the clinic door; collect the flowerpot.
- Click the broken stair.
- Zoom into the bottle.
- Collect the acid.
- Click the scroll and collect it from Dupin.
- Move into the hotel.
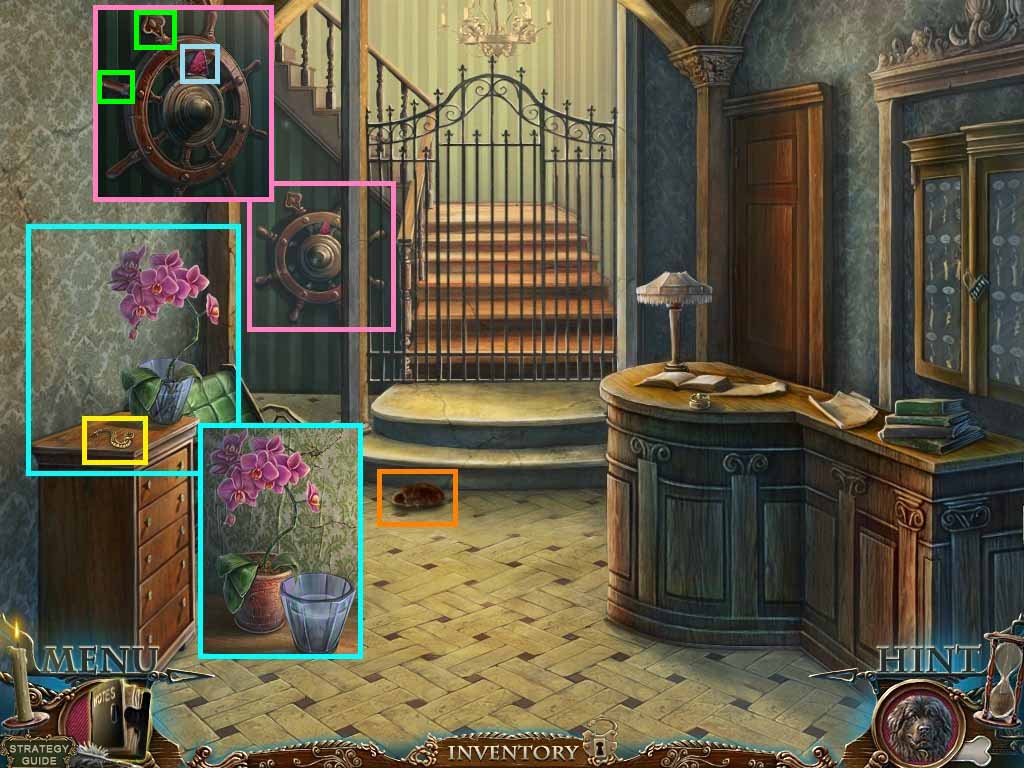
- Zoom into chest of drawers; collect the snake.
- Move the flowerpot next to the vase.
- Place the flowers into the flowerpot; collect the vase with water.
- Collect the shoe.
- Zoom into the ship’s wheel; collect the stained glass piece, and the 1st and 2nd weights.
- Move back once.
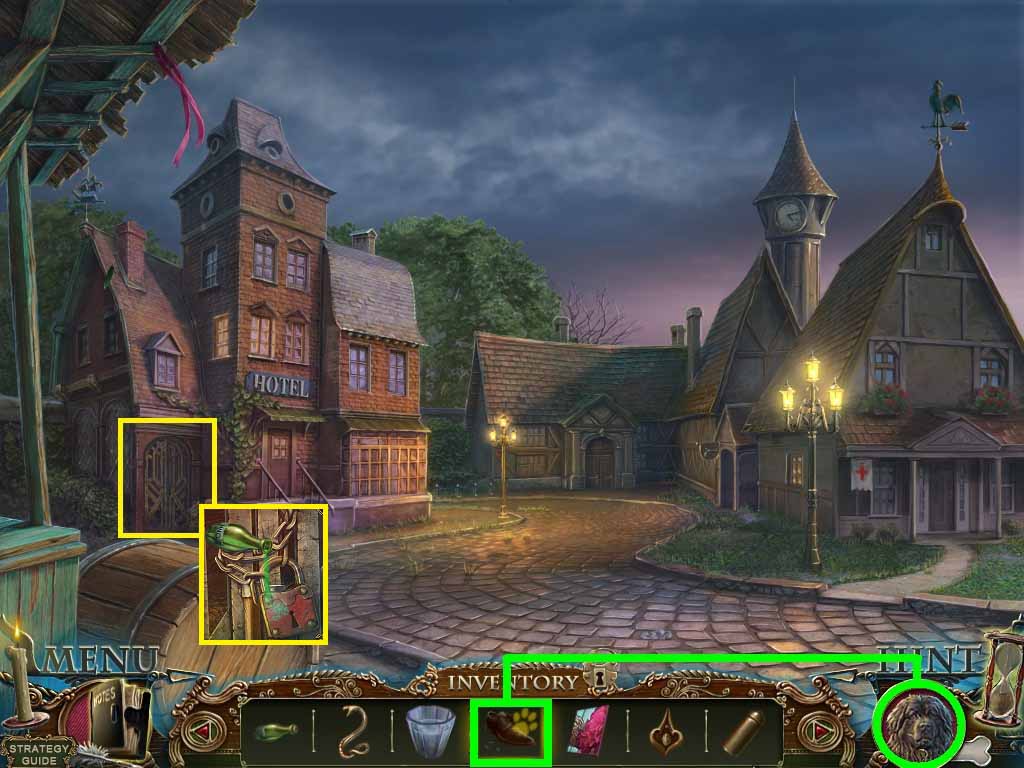
- Give Arthur the shoe.
- Zoom into the lock and pour the acid onto it.
- Go into the room.
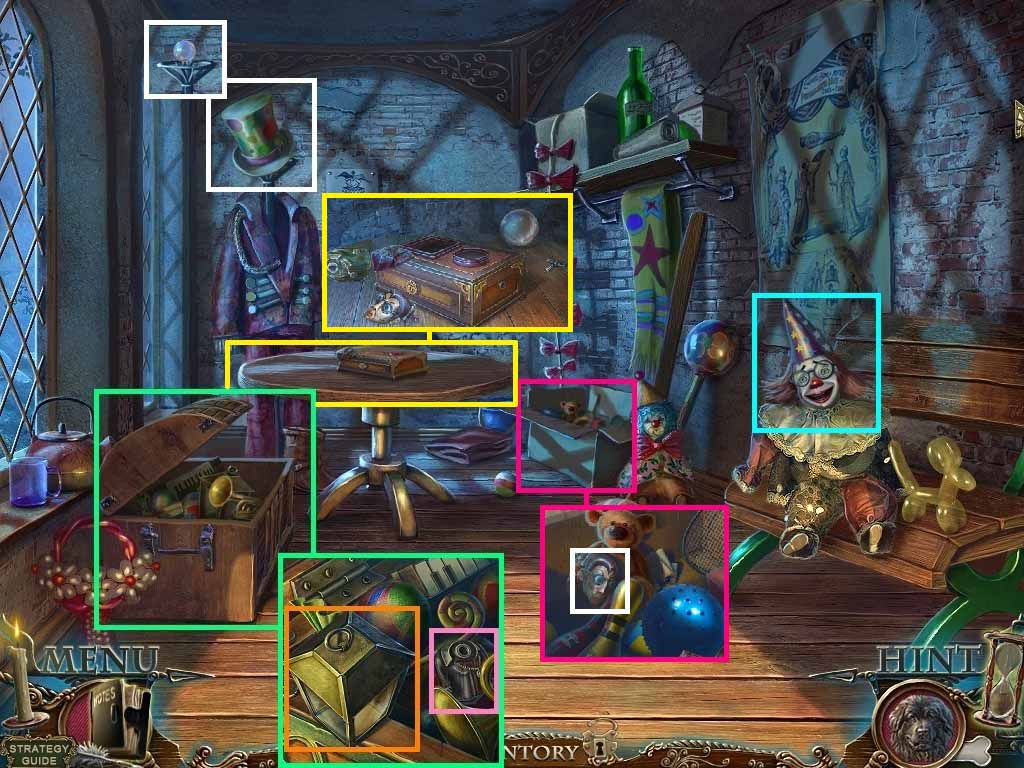
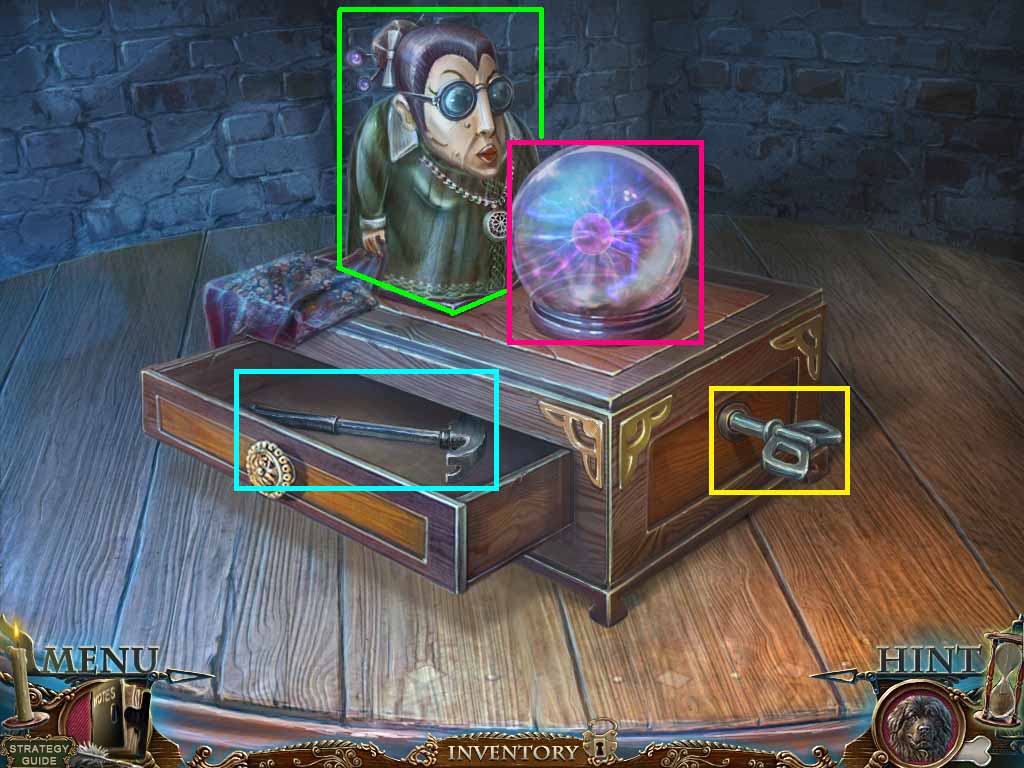
- Click the chest and zoom in.
- Click the lantern; collect the fortune teller’s body.
- Zoom into the hat; click it.
- Collect the magic ball.
- Zoom into the clown; collect the wind up key.
- Zoom into the box; click the blue ball.
- Collect the fortune tellers head.
- Zoom into the table.
- Place the wind up key, the fortune tellers head and body and magic ball onto the table.
- Put the body, head and the ball on top of the box.
- Insert the key into the hole and click it.
- Collect the hammer.
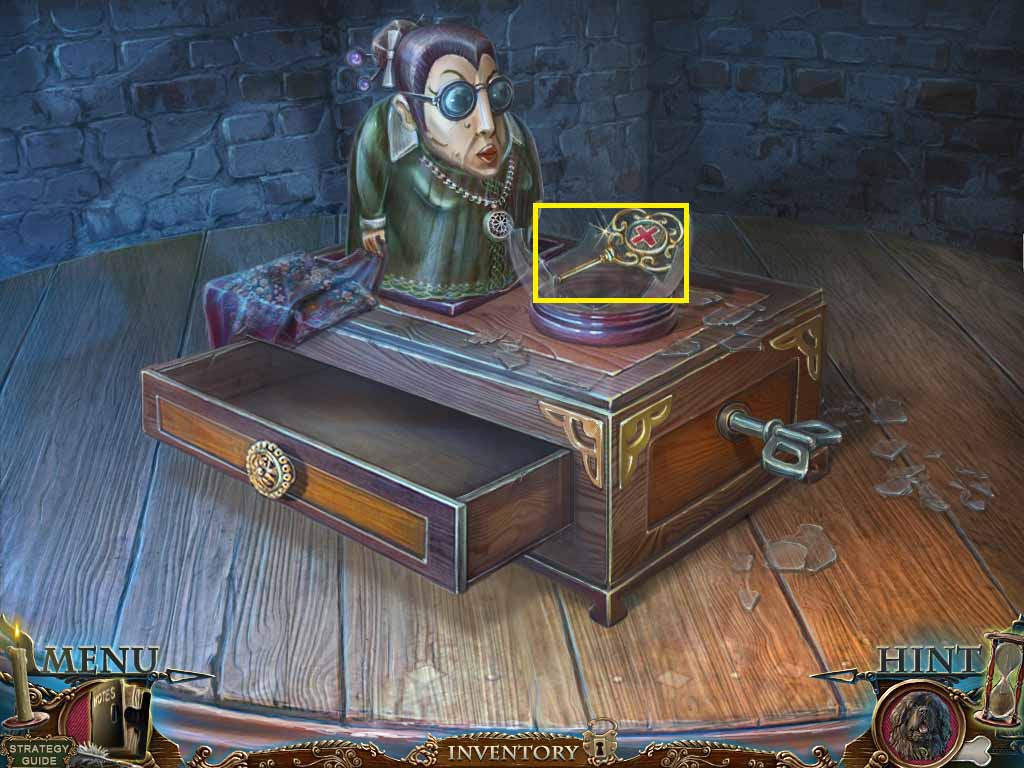
- Smash the ball using the hammer.
- Collect the doctor’s key.
- Move back one time.
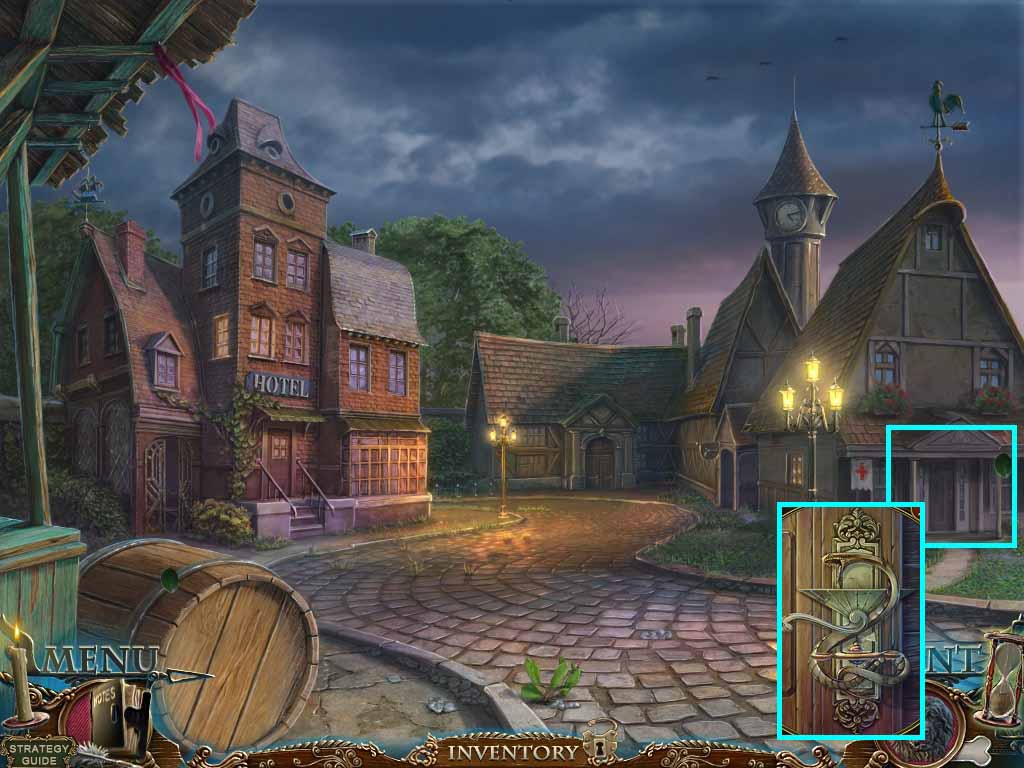
- Zoom into the clinic’s door lock.
- Insert the snake.
- Insert the doctor’s key and click it.
- Go through the door.
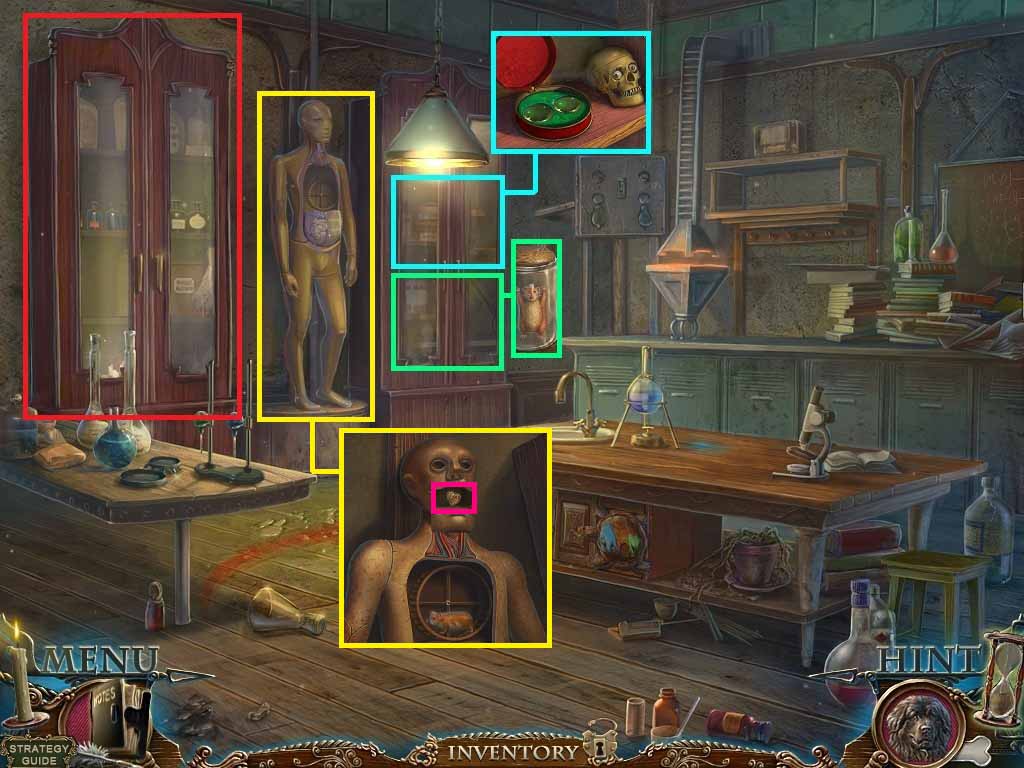
- Click the cabinet; zoom in.
- Click the container; collect the lenses.
- Zoom into the shelf.
- Click the jar lid and collect the hamster.
- Zoom into the dummy.
- Inset the hamster into the wheel; collect the rusty heart.
- Click the cabinet to access a hidden objects area.
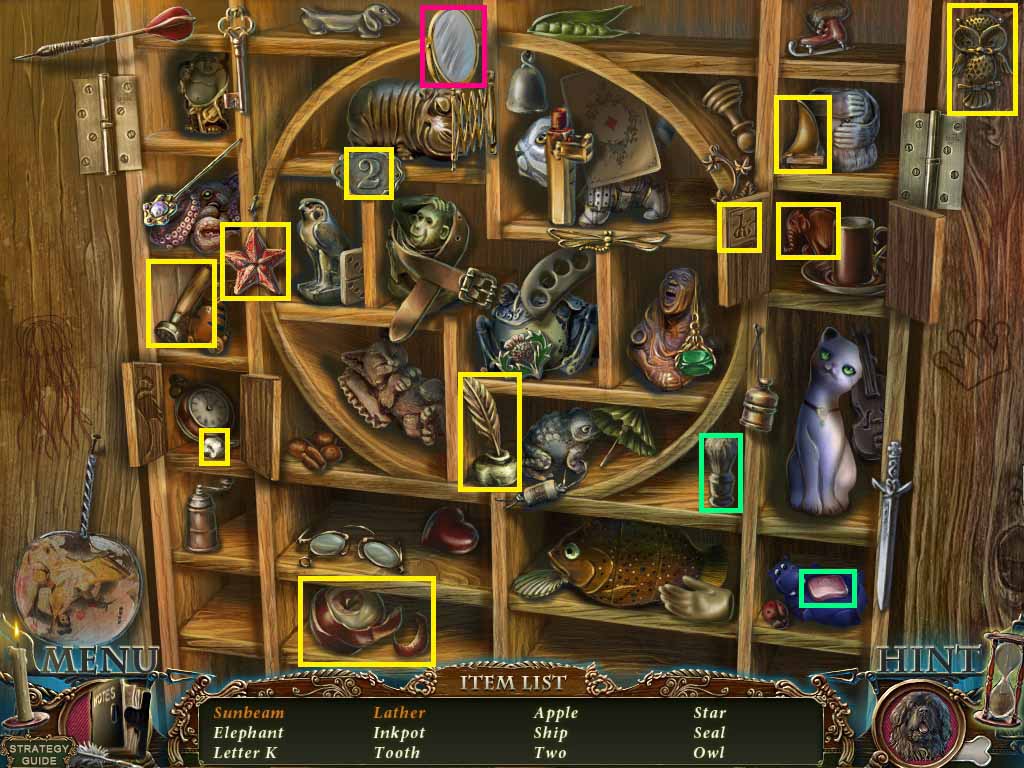
- Find the listed items.
- Click the cabinet doors to collect the elephant, the letter K and the tooth.
- Click the mirror two times to collect the sunbeam.
- Place the brush onto the soap to collect the foam.
- Collect the elephant.
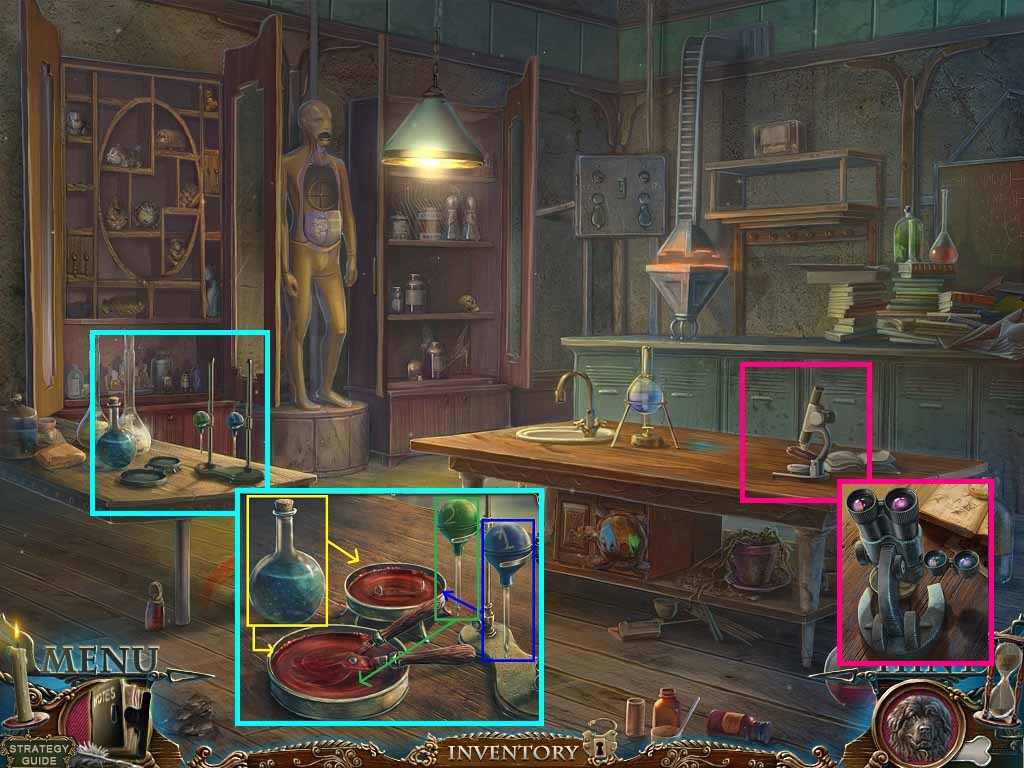
- Zoom into the table.
- Place the bloody nail and the bloody pruner into the dishes.
- Click the cork from the beaker.
- Pour the liquid into the dishes.
- Pump pipette 1 onto the nail dish.
- Pump pipette 2 onto the pruner dish.
- Collect the 2 pipettes with blood.
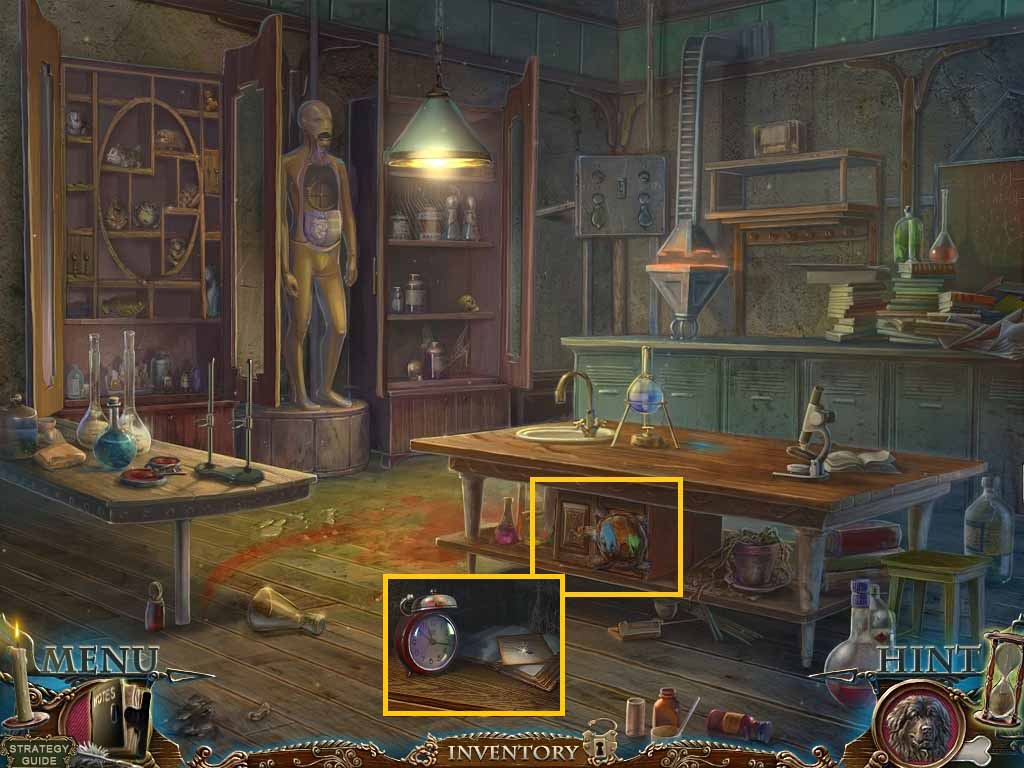
- Zoom into the microscope; pump the 2 pipettes with blood into the dish.
- Put the lenses into the holder and click them.
- Put the dish onto the tray; click the tray.
- Examine the scope to trigger a puzzle.

- Match the color samples.
- To solve follow this sequence:
- B – A – G- D – E – F – A –B – C – D – E – F – A – G – J – I – H – M – L – K- J – I – H – M – L – K – J – I – H
- Collect the instructions.
- Zoom into the cabinet.
- Place the instructions on the left and insert the elephant into the slot.
- Click and drag the elephant heads to match the instructions.
- Click the cabinet and collect the note.
- Click the alarm clock; collect the bell.
- Move back one time and go into the hotel.

- Zoom into the front desk.
- Put the bell onto the bell bottom.
- Click and drag the bell button on the top.
- Ring the bell.
- Hand the concierge the note.
- Move upstairs.
- Collect the veil.
- Zoom into the table to access a hidden objects area.