
Dark Tales: Edgar Allan Poe's The Gold Bug: Chapter Three: Around the Shipping Dock
Our Dark Tales: Edgar Allan Poe's The Gold Bug Walkthrough is the perfect detective's dossier on helping you locate the lost treasure of Captain Kidd and sooth LeGrand's biting obsession. In this Dark Tales Walkthrough, you'll find a treasure trove of vital information including custom screenshots, solutions to mini-games and puzzles, as well as detailed instructions to help you crack the code on this classic twist of the famed short story by Edgar Allan Poe.

- Find the listed items.
- Collect the matches by moving the flowers.
- Click the popper to create the snow.
- Collect the matches.
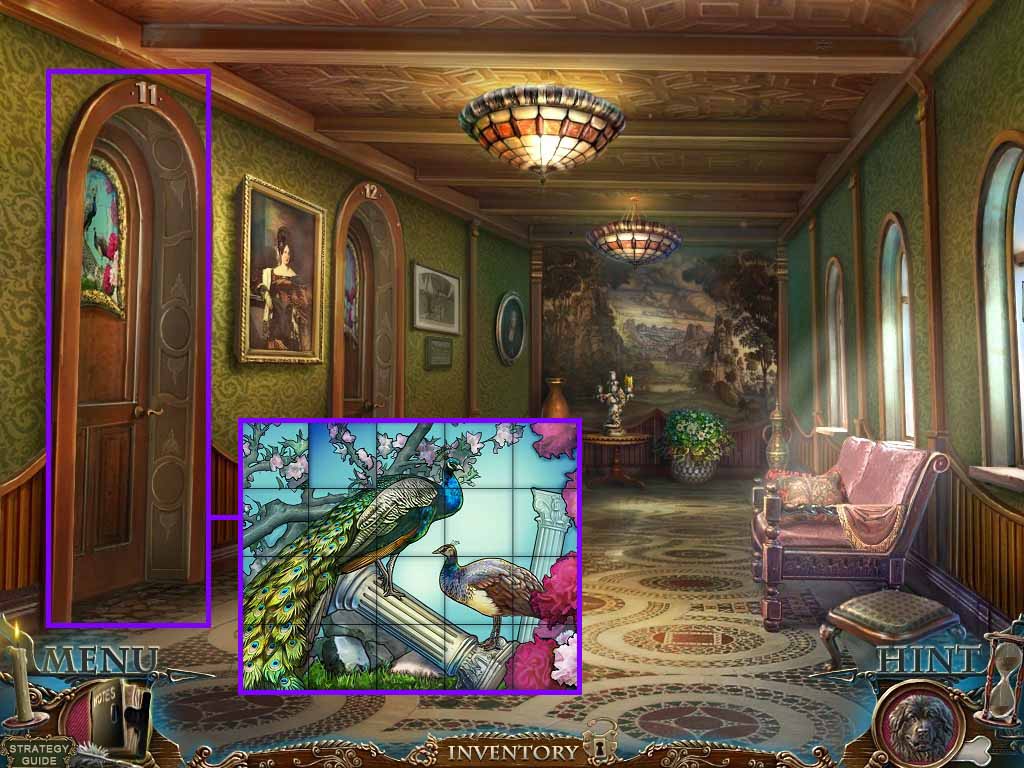
- Zoom into the door; insert the piece of stained glass to trigger a puzzle.
- Click and drag the pieces into the correct arrangement.
- Move left and into room 11.
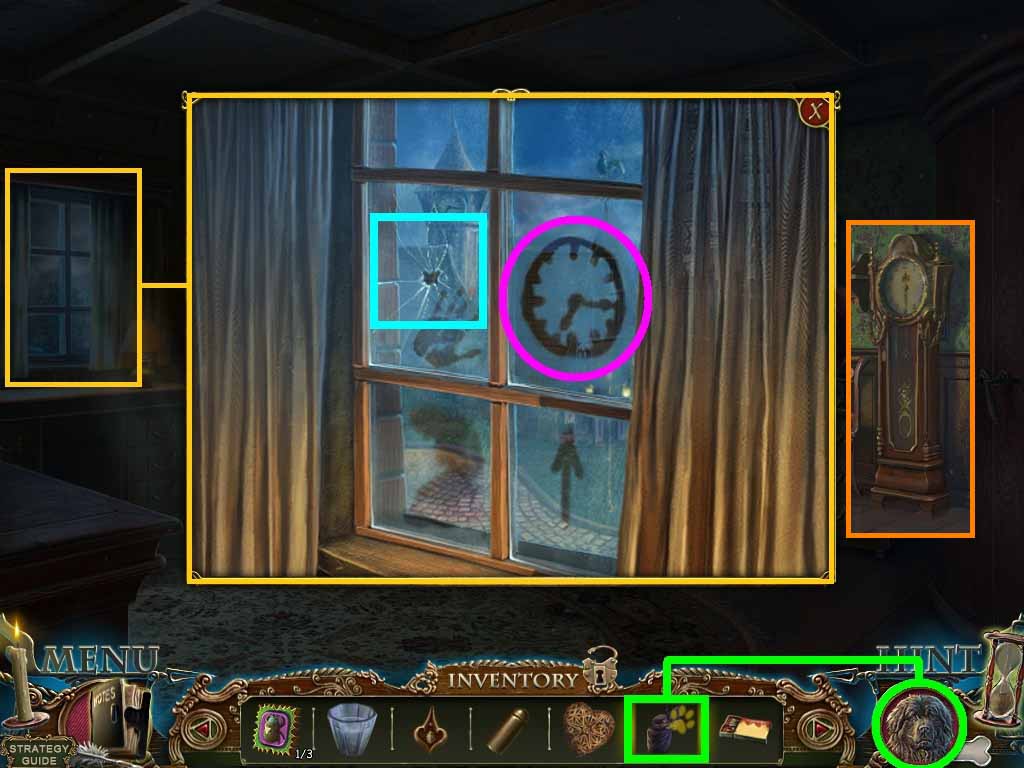
- Zoom into the top most window panes.
- Click the hole in the glass.
- Notice the time 7:15.
- Hand Arthur the veil.
- Close the close-up.
- Zoom into the clock face; insert the 2 weights onto the chains to trigger a puzzle.
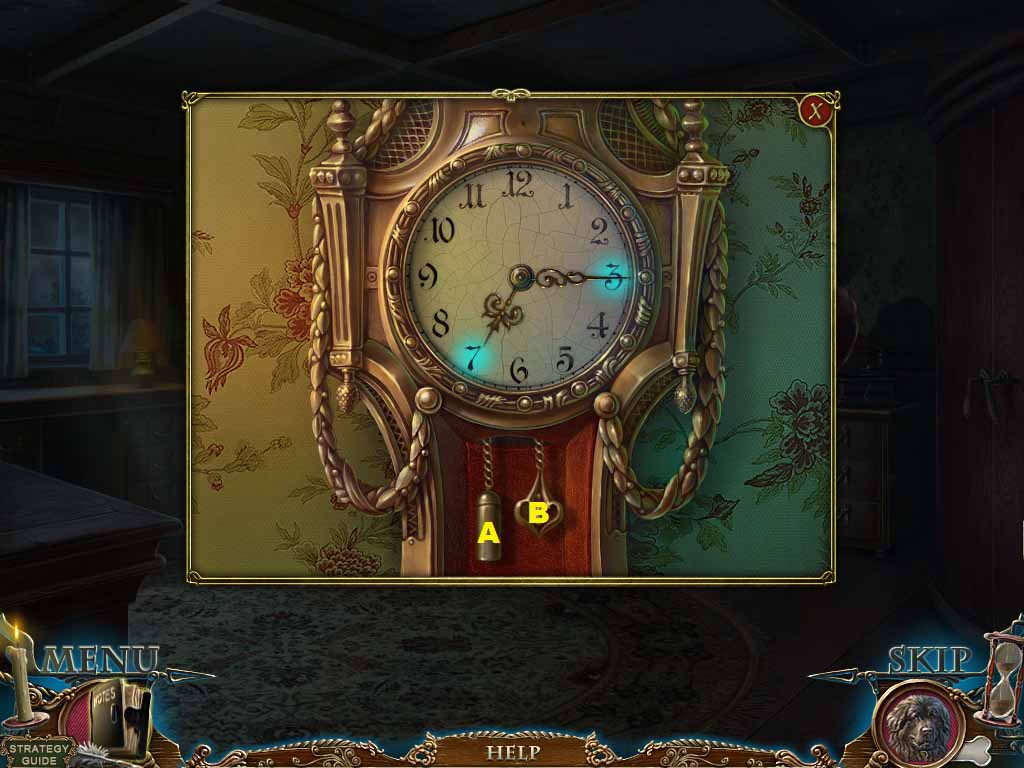
- Solve as follows:
- B: 3 x’s
- A: 8 x’s
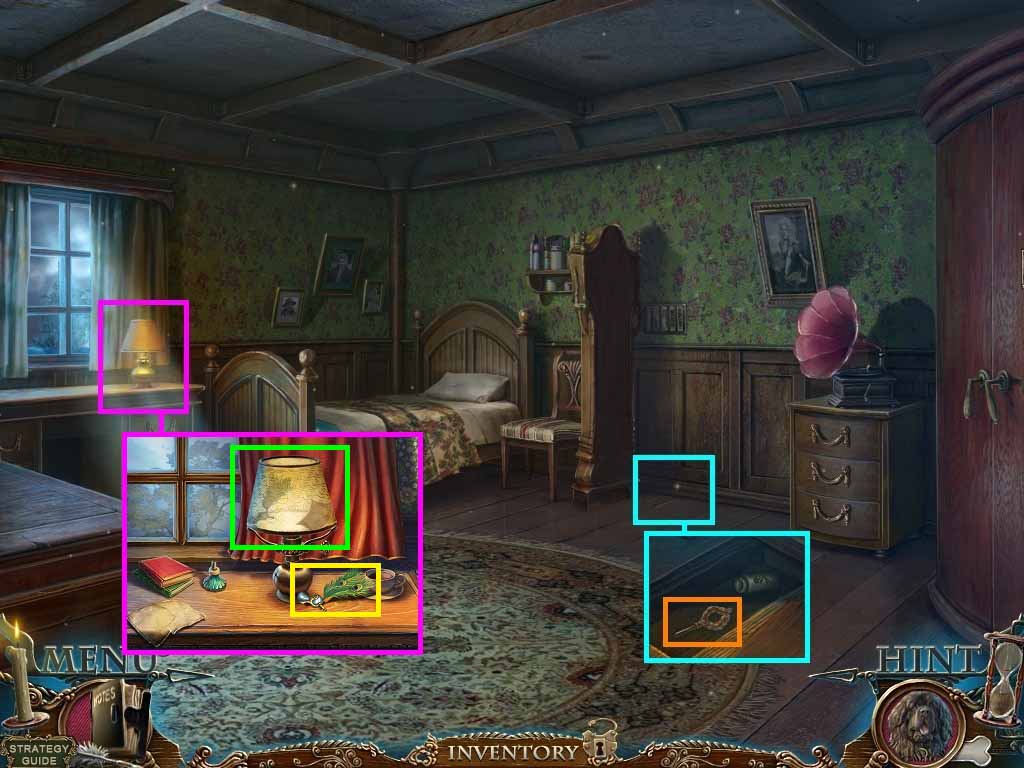
- Zoom into the floor.
- Click the floor board; collect the lamp valve.
- Notice the poison bottle.
- Zoom in two times to the lamp on the desk.
- Insert the lamp valve into the hole; click the valve.
- Click the lamp shade; collect the note.
- Collect the ringer bird’s head.
- Move back three times.
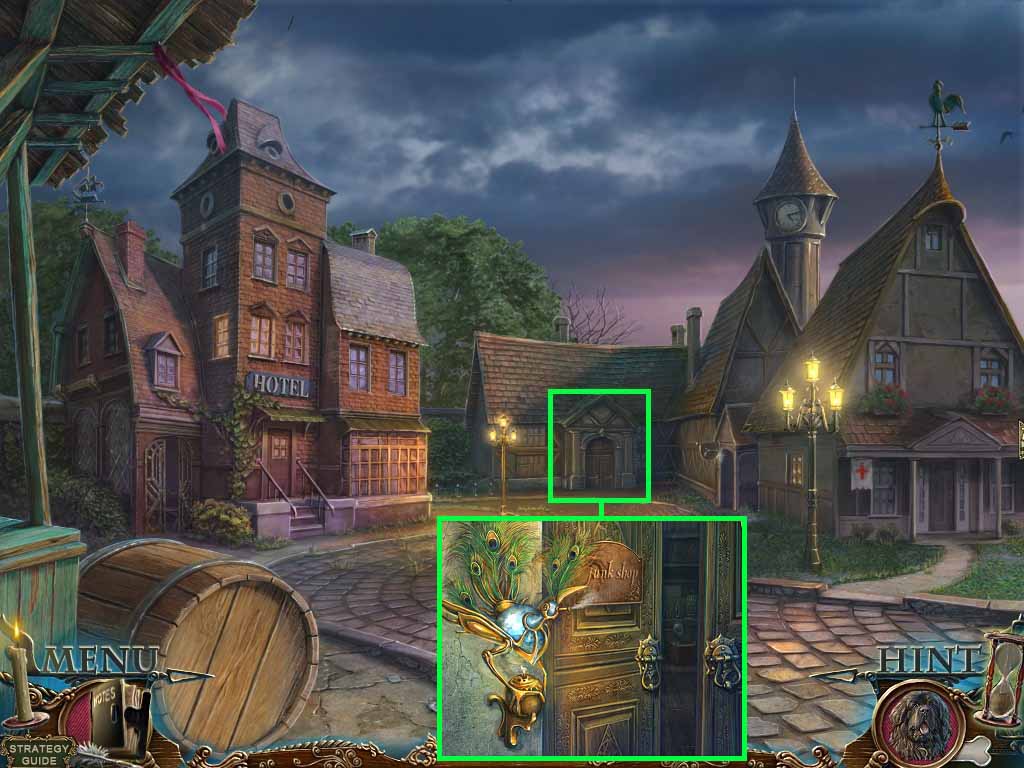
- Zoom into the junk shop door.
- Pour the vase with water into the ringer.
- Place the ringer bird’s head onto the top of the ringer.
- Use the matches on the burner.
- Go into the junk shop.
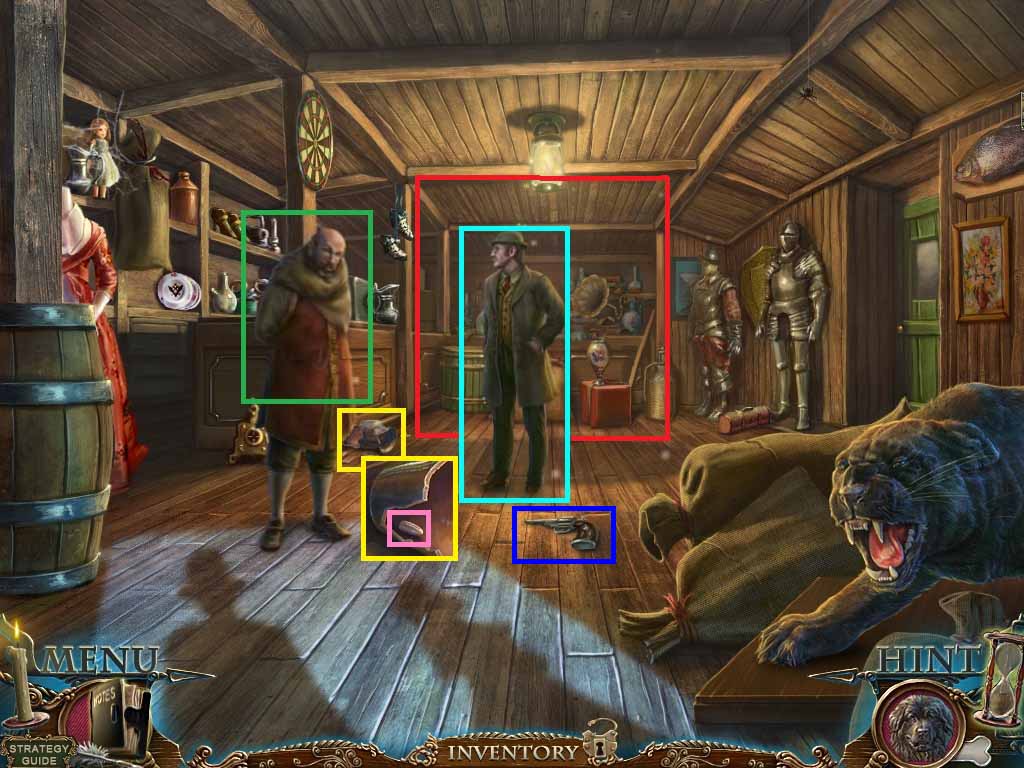
- Click Le Grand.
- Hand the junk dealer the note.
- Zoom into the broken vase; collect the bullet 1/ 2.
- Collect the gun.
- Zoom into the back wall to access a hidden objects area.
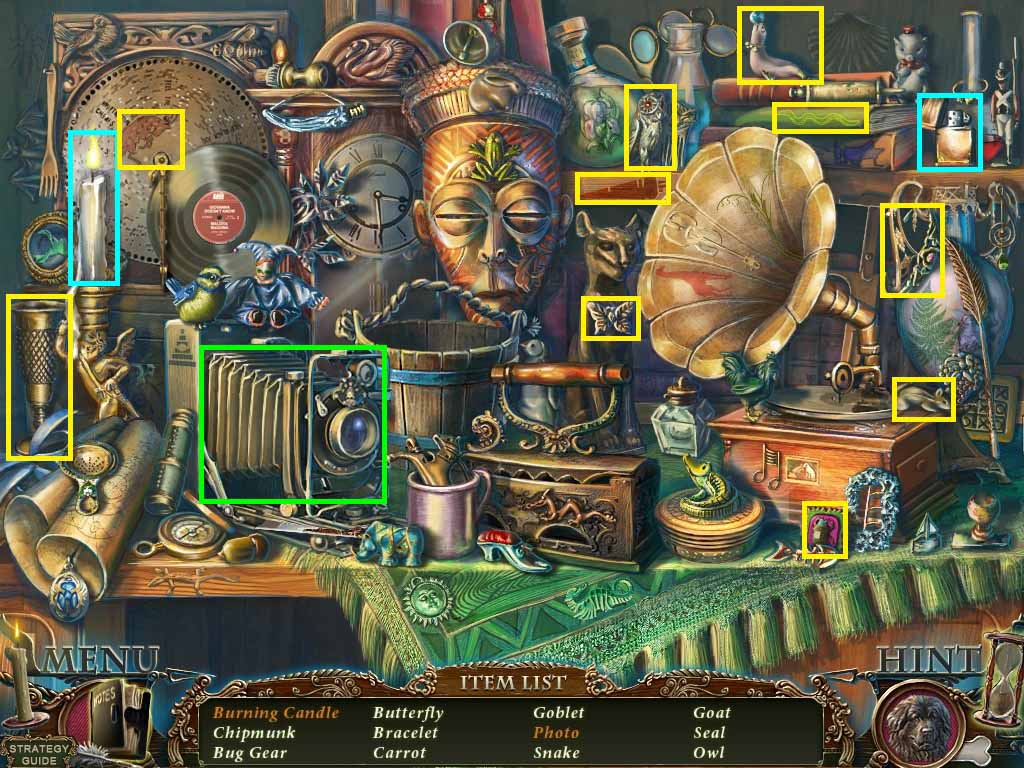
- Find the listed items.
- Click the camera to collect the photo.
- Light the candle using the lighter; collect the burning candle.
- Collect the insect gear 2/ 3.
- Move out the door on the right.
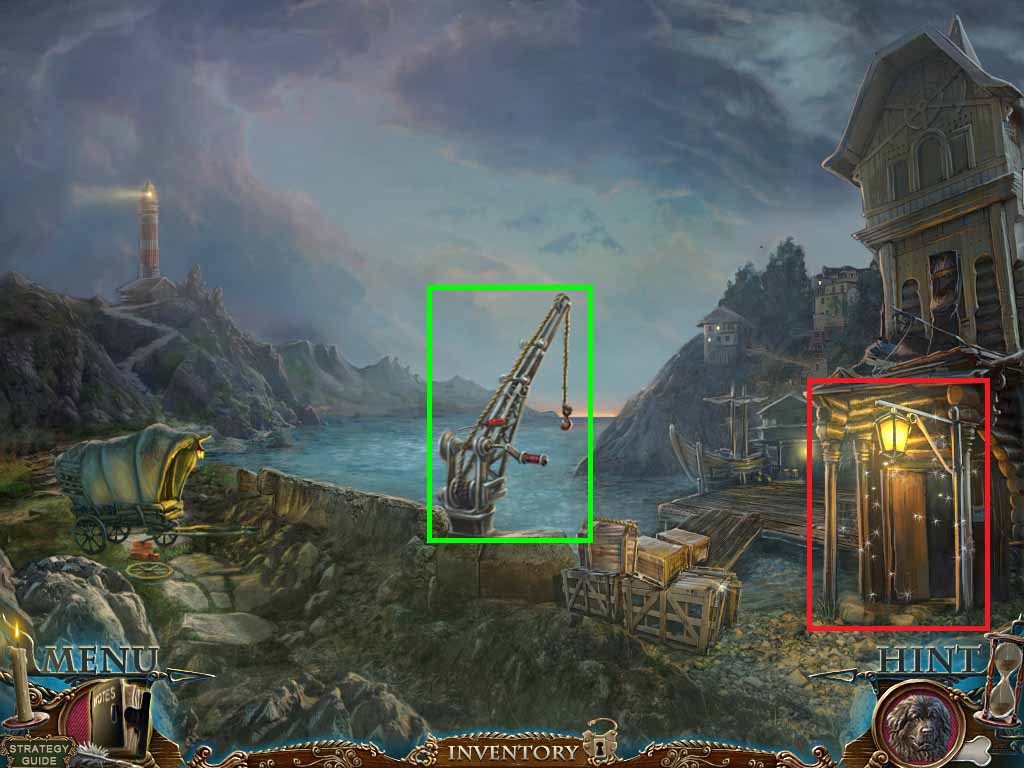
- Zoom into the crane; collect the screwdriver.
- Zoom into the building entrance to access a hidden objects area.
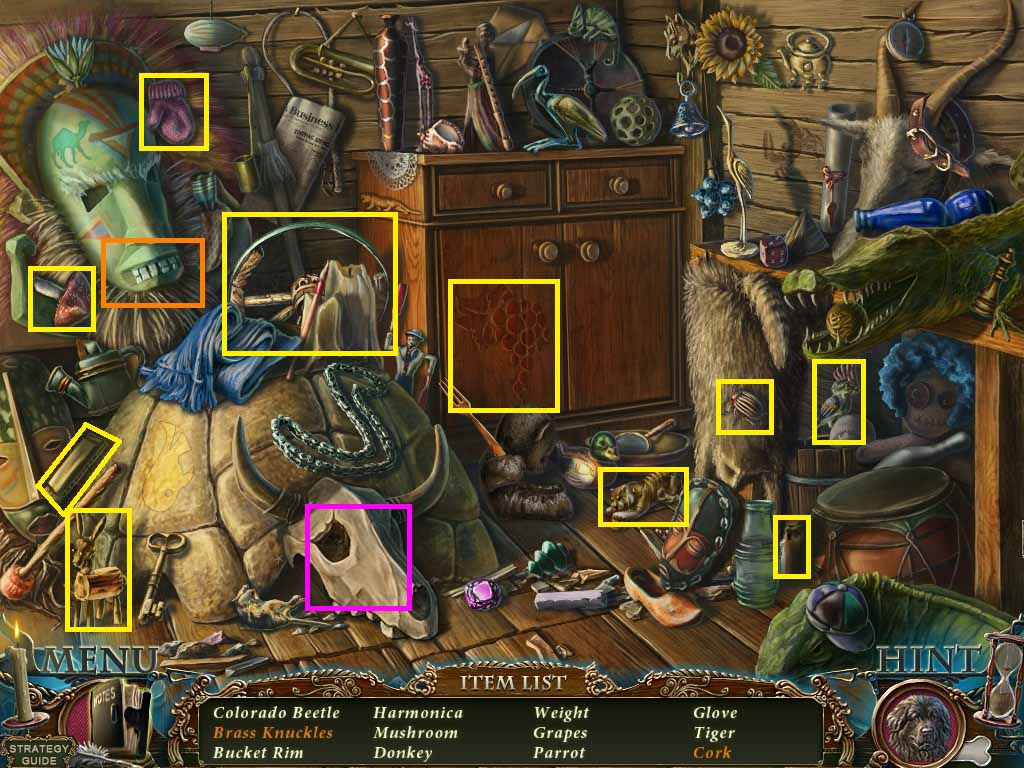
- Find the listed items.
- Click the skull; collect the brass knuckles.
- Click the mask jaw; collect the cork.
- Collect the iron rim.
- Move back two times and go into the hotel; move upstairs.
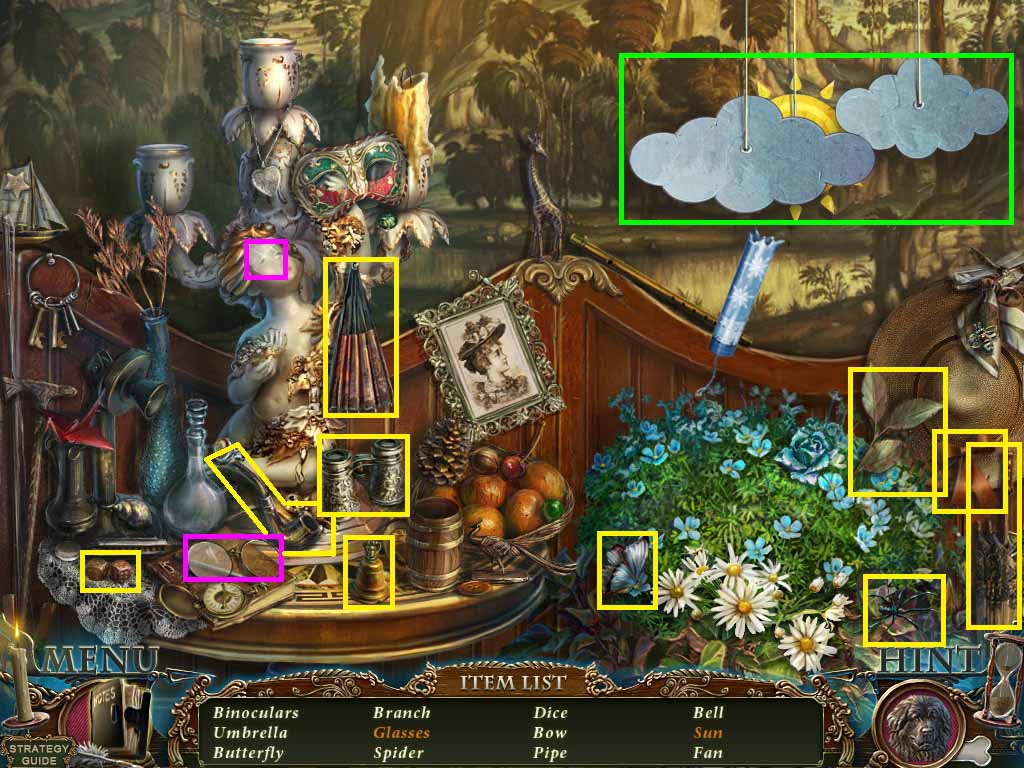
- Zoom into the end of the hallway to access a hidden objects area.
- Find the listed items.
- Click the clouds; collect the sun.
- Place the lens into the frame; collect the glasses.
- Collect the binoculars,
- Move left into the room 11.
- Zoom into the wall grate.
- Use the screwdriver on it; collect the insect gear 3 /3.
- Use the binoculars on the code.
- Move back two times.
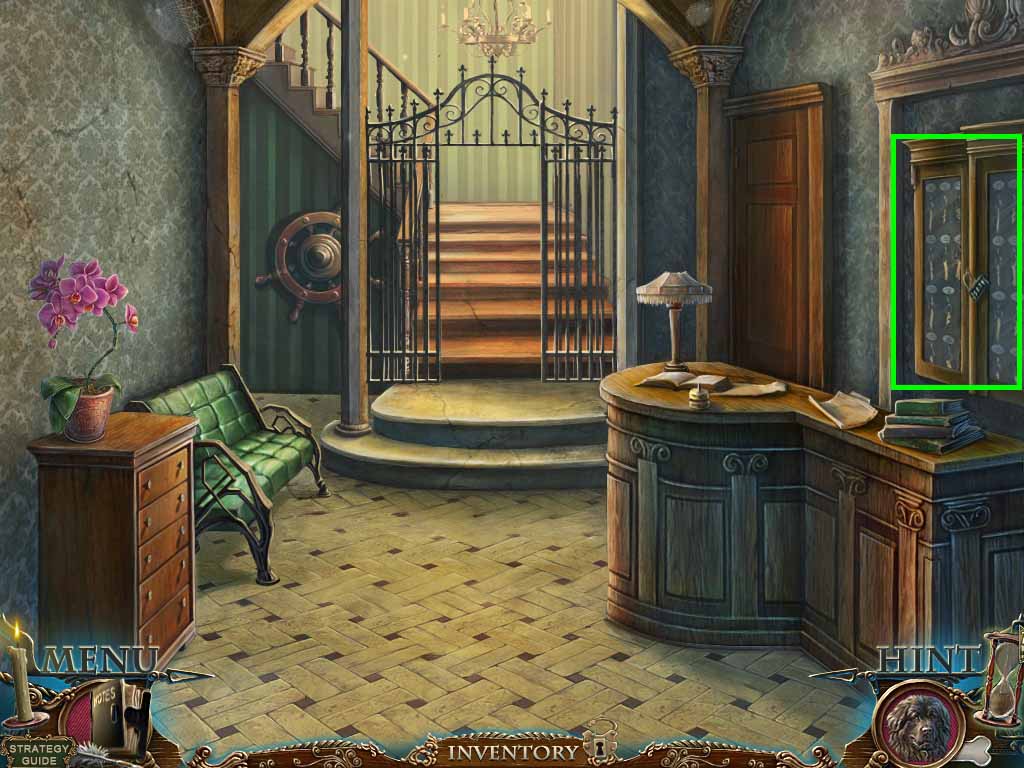
- Zoom into the key cabinet two times.
- Use the code from upstairs: 4895.
- Click the cabinet to trigger a puzzle.
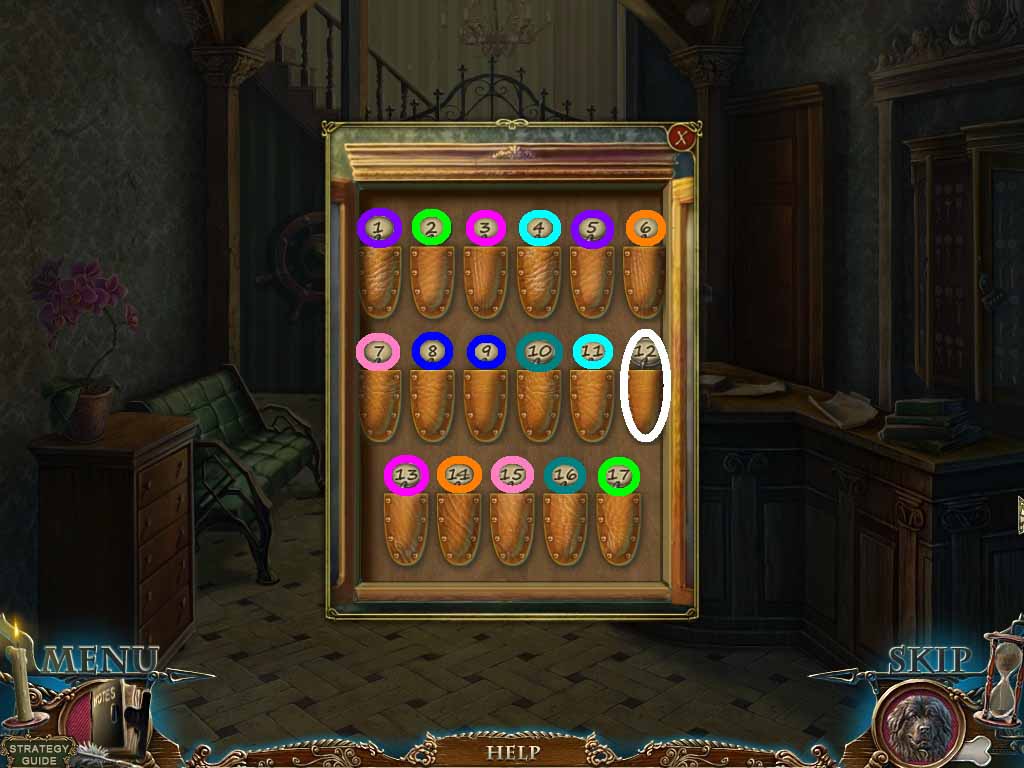
- Find the matching pairs of keys.
- Collect the head waiter’s key.
- Move up the stairs.
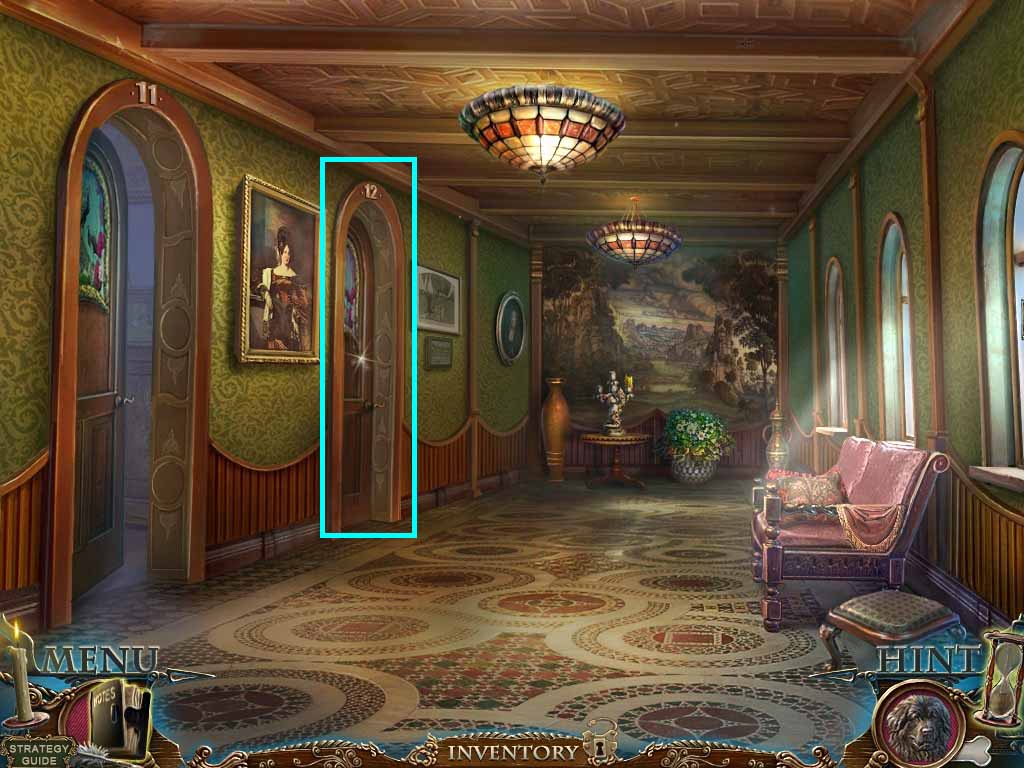
- Zoom into the room 12 door.
- Insert the head waiter’s key into the lock; click it.
- Move into room 12.
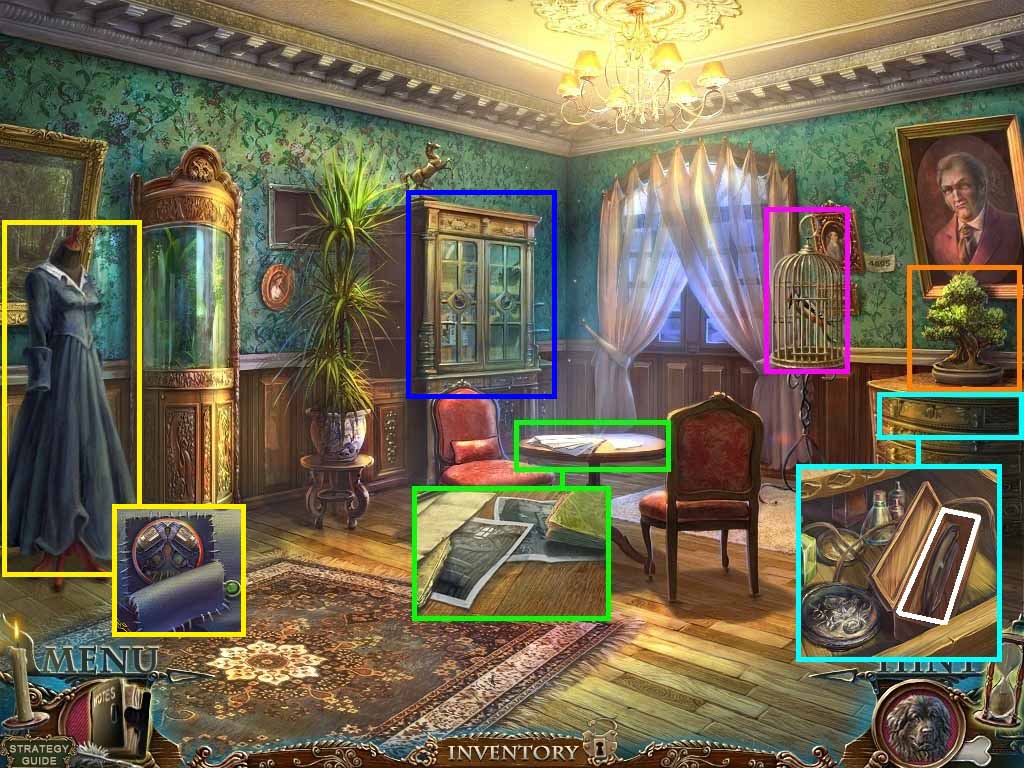
- Zoom into the table; collect the pictures and bullet 2/ 2.
- Zoom into the bonsai tree; collect the pin.
- Zoom into the birdcage; insert the pin into the lock and collect the woodpecker.
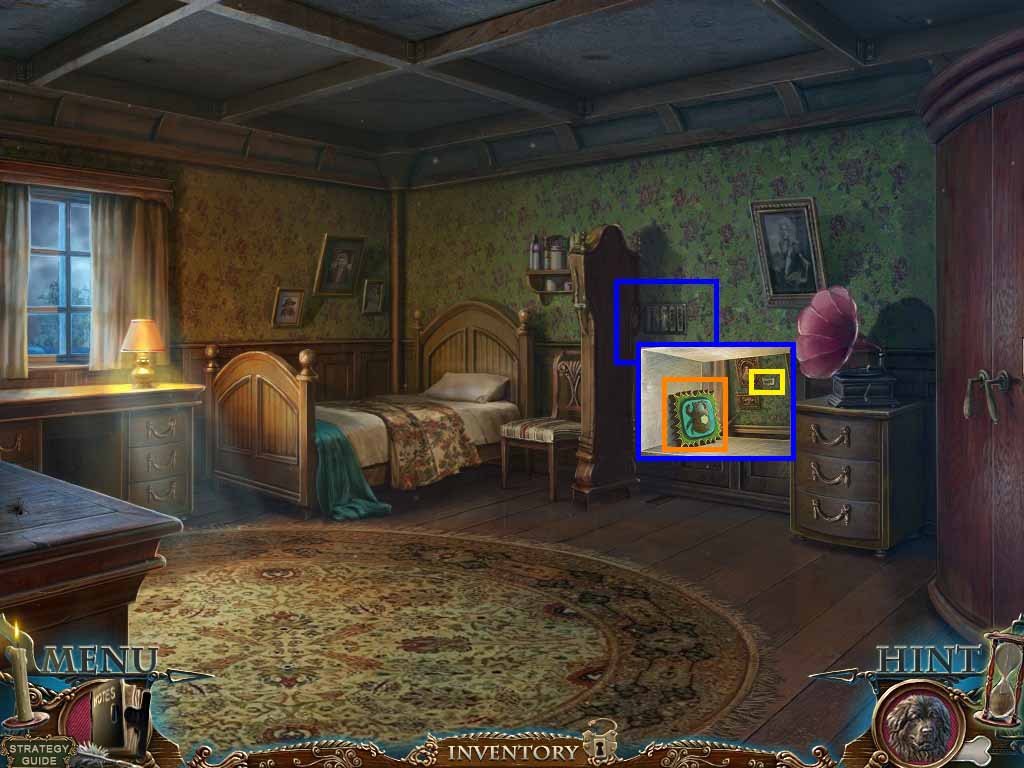
- Click the drawer and zoom in.
- Click the box and collect the razor.
- Zoom into the dress.
- Cut the patch using the razor; collect the gun shop part.
- Click the right cabinet and zoom in.
- Move back three times.
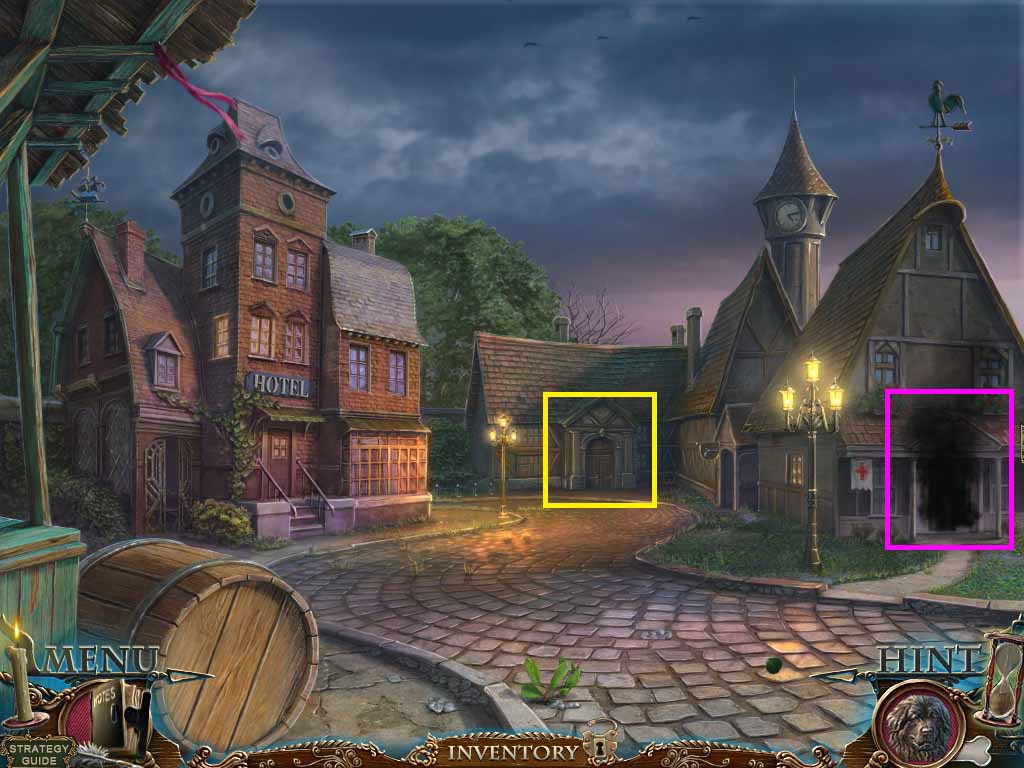
- Zoom into the smoking doorway.
- Move forward into the junk shop.
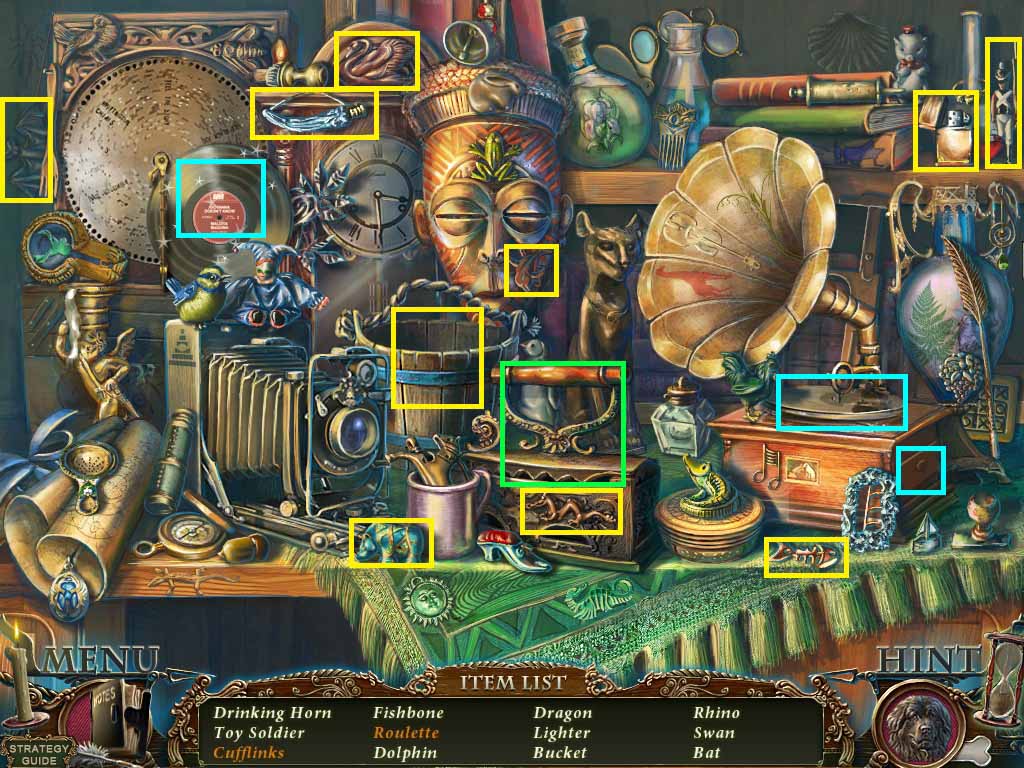
- Zoom into the back wall to access a hidden objects area.
- Find the listed items.
- Click the iron; collect the roulette.
- Put the record on the phonograph; collect the cufflinks.
- Collect the empty bucket.
- Move out of the door in the right.
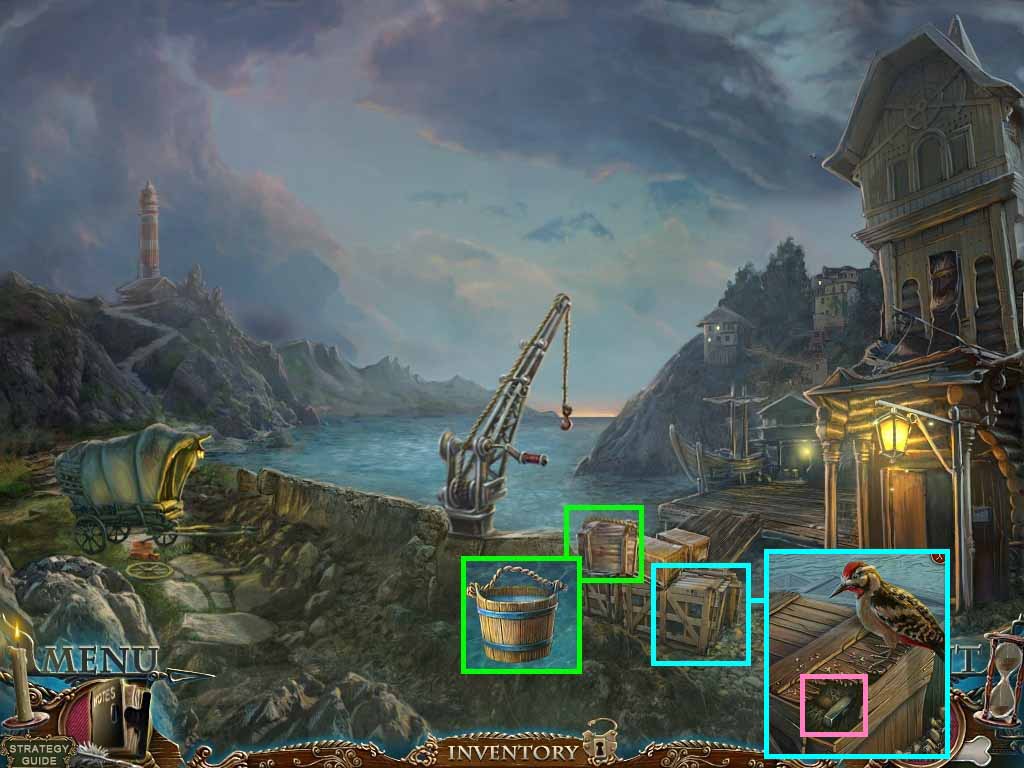
- Zoom into the top crate.
- Dip the bucket into the water; collect the bucket with water.
- Zoom into the bottom right crate.
- Place the woodpecker onto it.
- Collect the hammer.
- Move back two times.
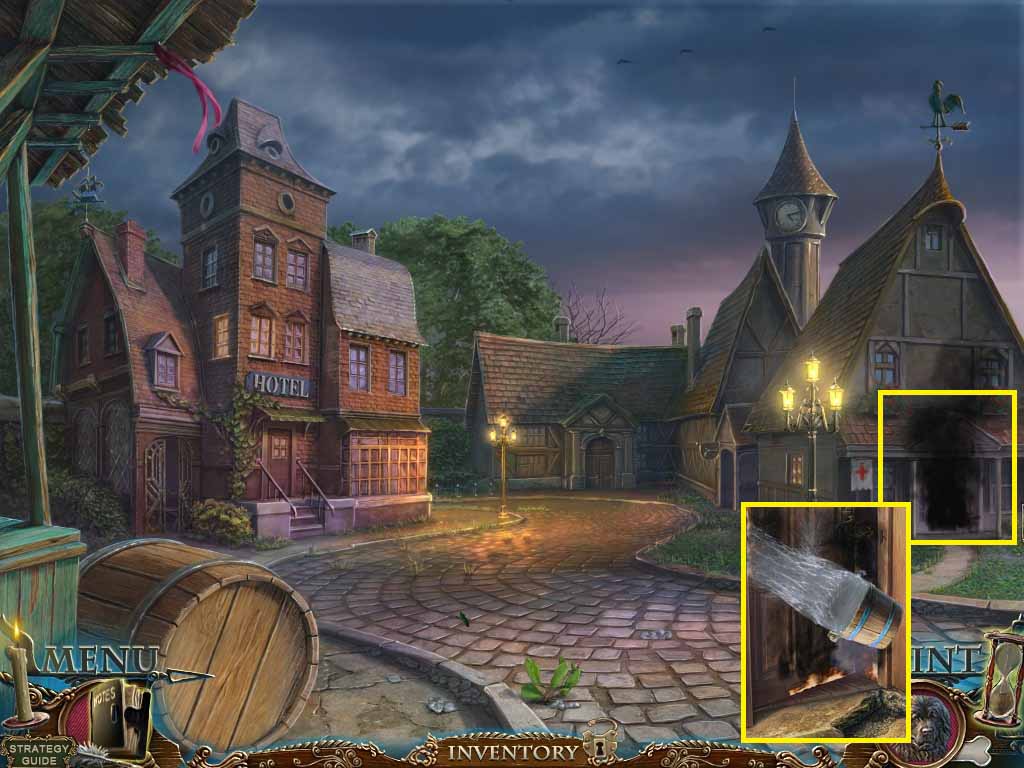
- Zoom into the smoking doorway.
- Pour the bucket with water onto the flames.
- Move into the doctor’s lab.
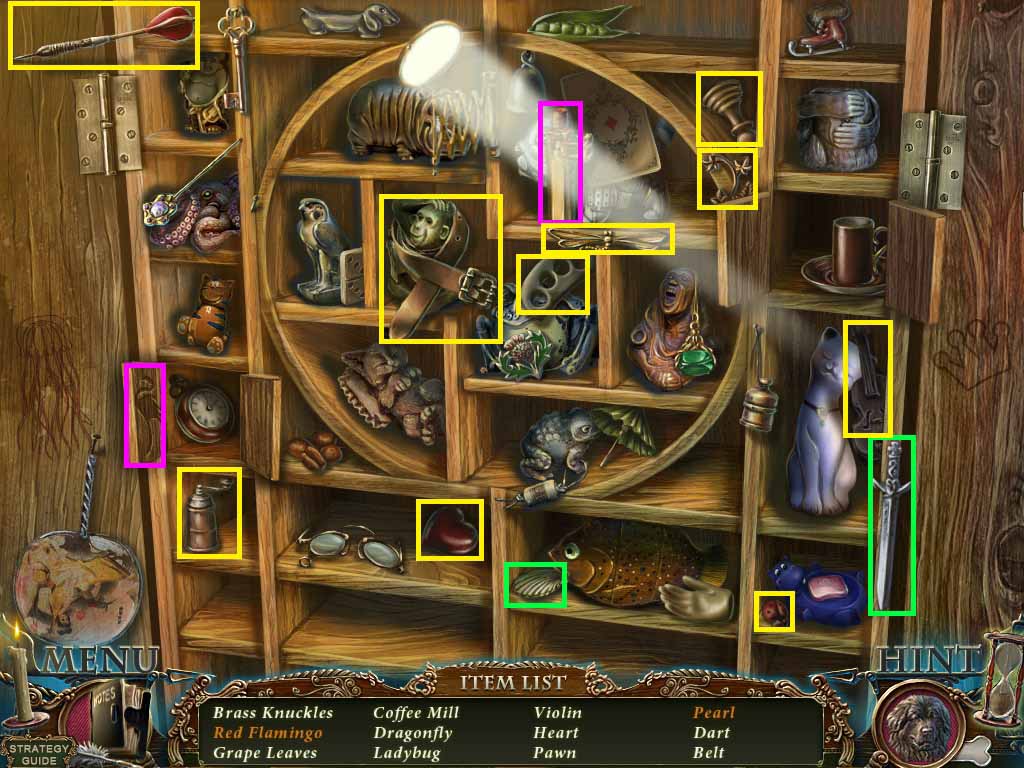
- Zoom into the left cabinet to access a hidden objects area.
- Find the listed items.
- Collect the pearl by using the knife on the shell.
- Paint the flamingo using the red lipstick to collect the red flamingo.
- Collect the belt.
- Move back one time.
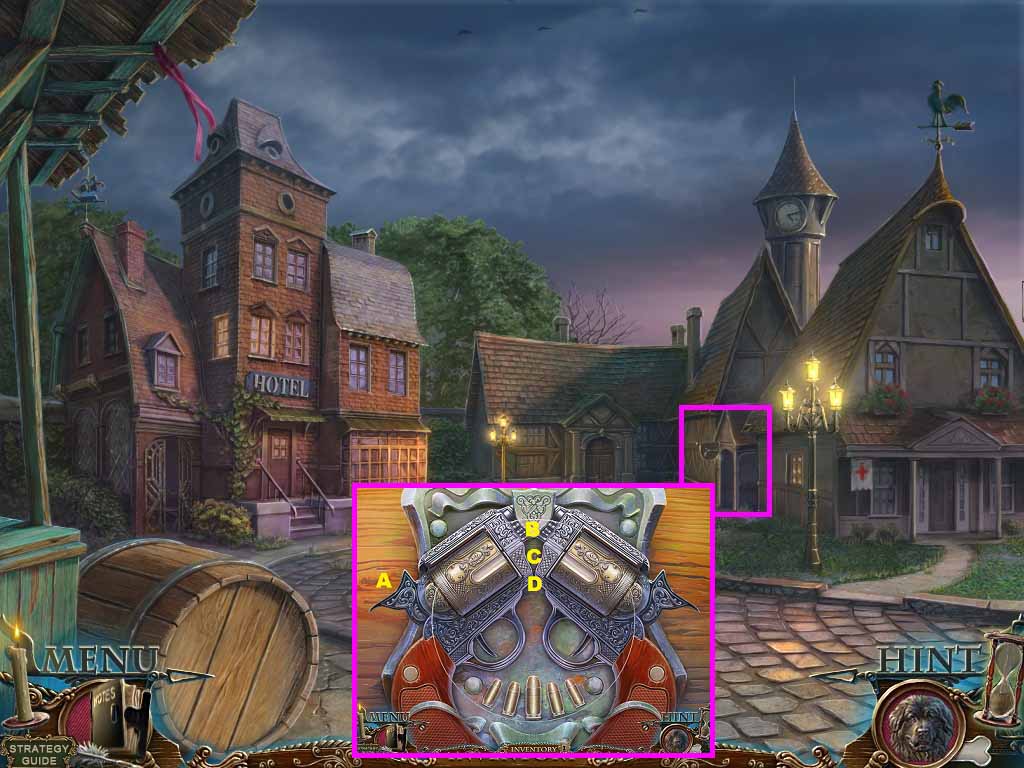
- Zoom into the gun shop door two times.
- Insert the gun shop part into the lock; a puzzle will trigger.
- To solve the puzzle use this formula:
- B: 1x
- A: 2 x’s
- C: 1x
- A: 6 x’s
- D: 1x
- A: 2x’s
- Move into the gun shop.
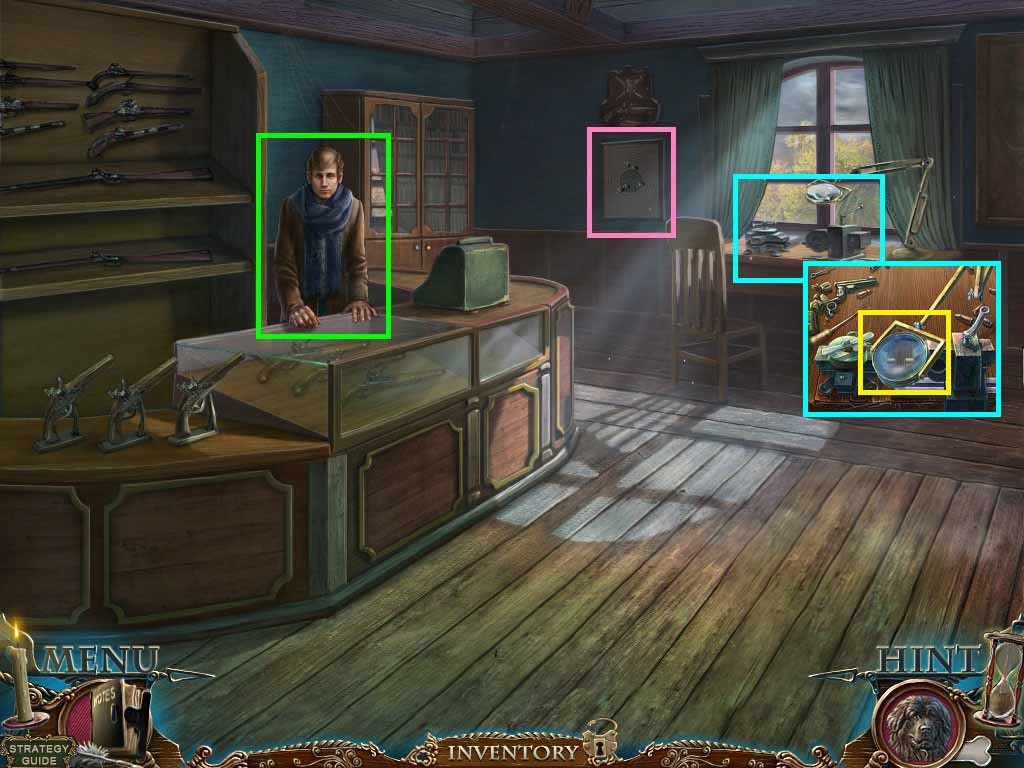
- Give Mike the gun.
- Zoom into the picture; collect the nails.
- Zoom into the desk.
- Put the 2 bullets into the vise; click the magnifying glass to trigger a puzzle.
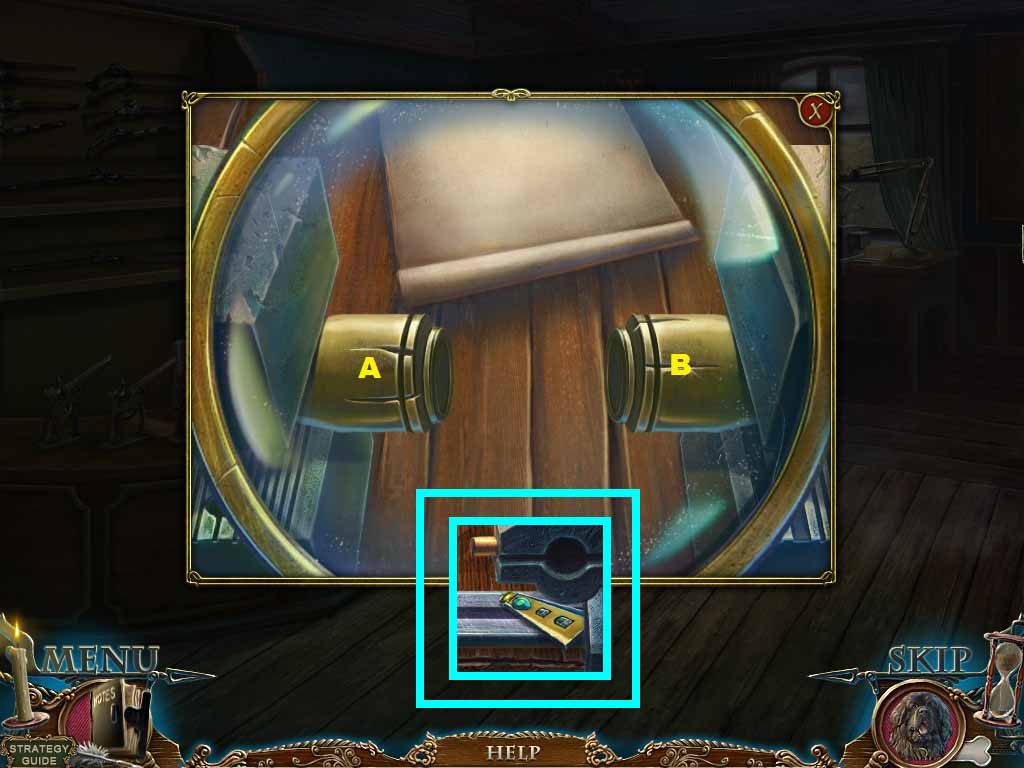
- Match the bullets grooves.
- Rotate the bullets as follows
- A –A – B - B - A – B
- Collect the lighthouse door part 1/ 2.
- Move back once; go forward through the junk shop and then right out the door.
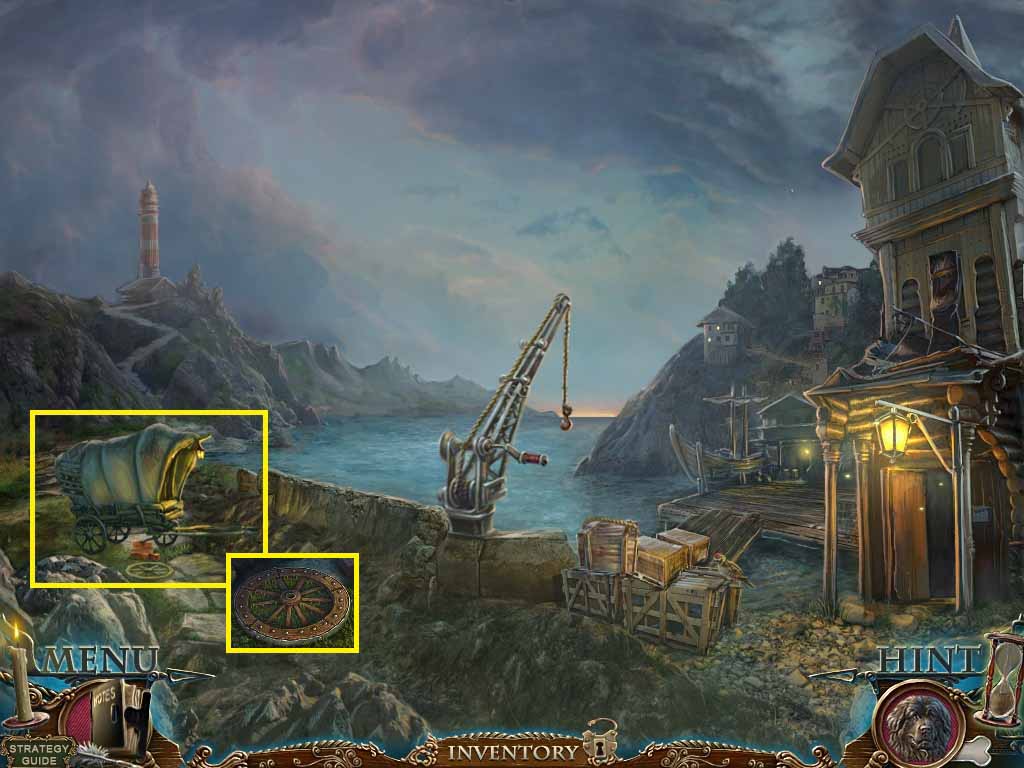
- Zoom into the wagon.
- Use the iron rim, nails and the hammer to fix the broken wheel; collect the wheel.
- Put the wheel onto the axle.
- Collect the wheel.
- Move up the cleared path.