Shadow Wolf Mysteries: Cursed Wedding: Chapter Two: Weapons
Our Shadow Wolf Mysteries: Cursed Wedding Walkthrough is just the thing to help you overcome any obstacles you'll encounter as you launch your investigation to help your friend Veronica. Just a day before her wedding, the ancient werewolf Mephistus appeared, ready to exact his revenge. With the help of our detailed instructions and custom screenshots found in this helpful Shadow Wolf Walkthrough, you'll have no trouble solving this fearsome mystery.
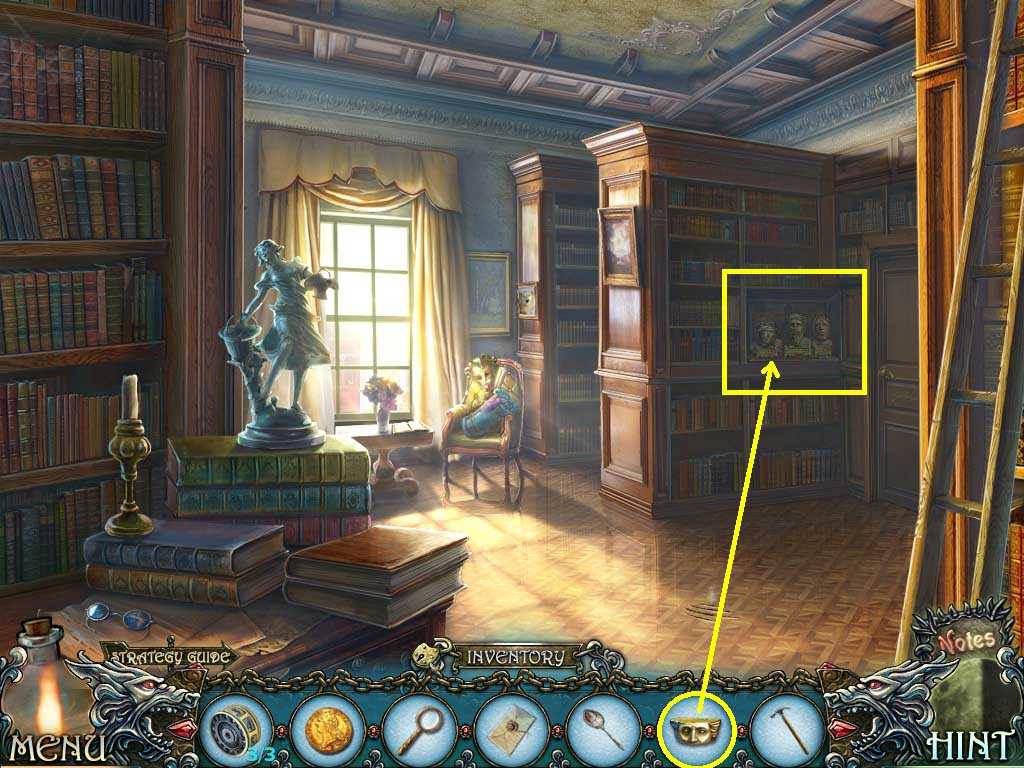
- Zoom into the bust on the bookshelf.
- Place the Pythagoras head onto the shelf.
- A puzzle will trigger.
- Arrange the bust in the correct order.
- Solve as shown above.
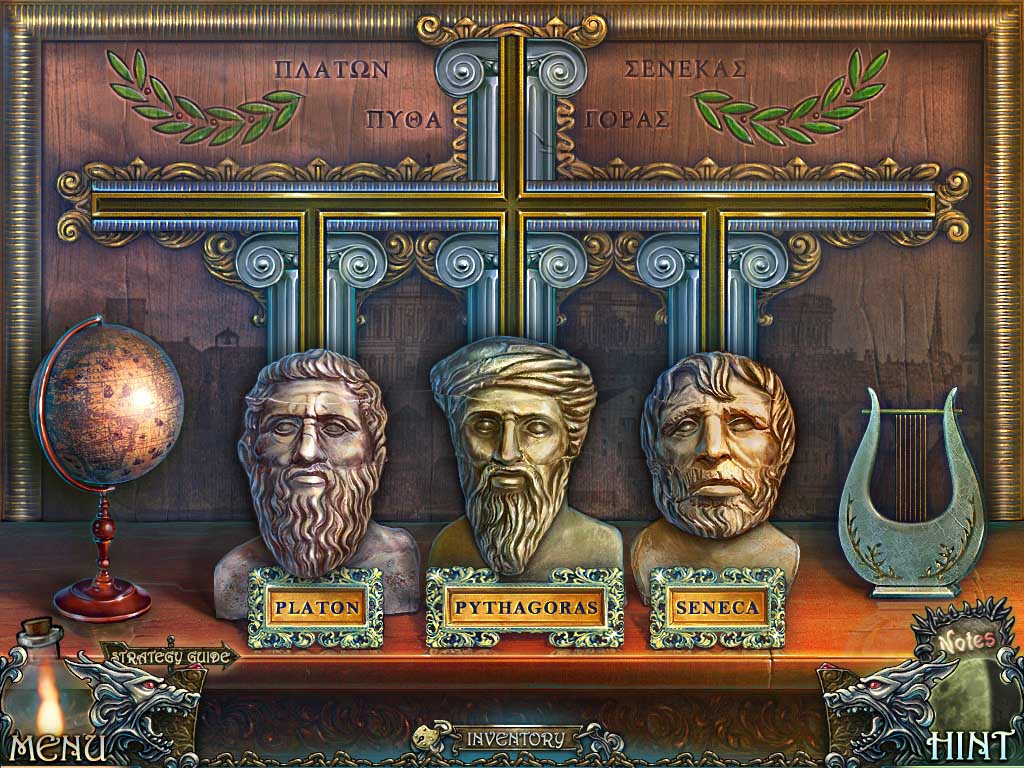
- Go through the door on the right.
- Click the desk.
- Place the envelope on it.
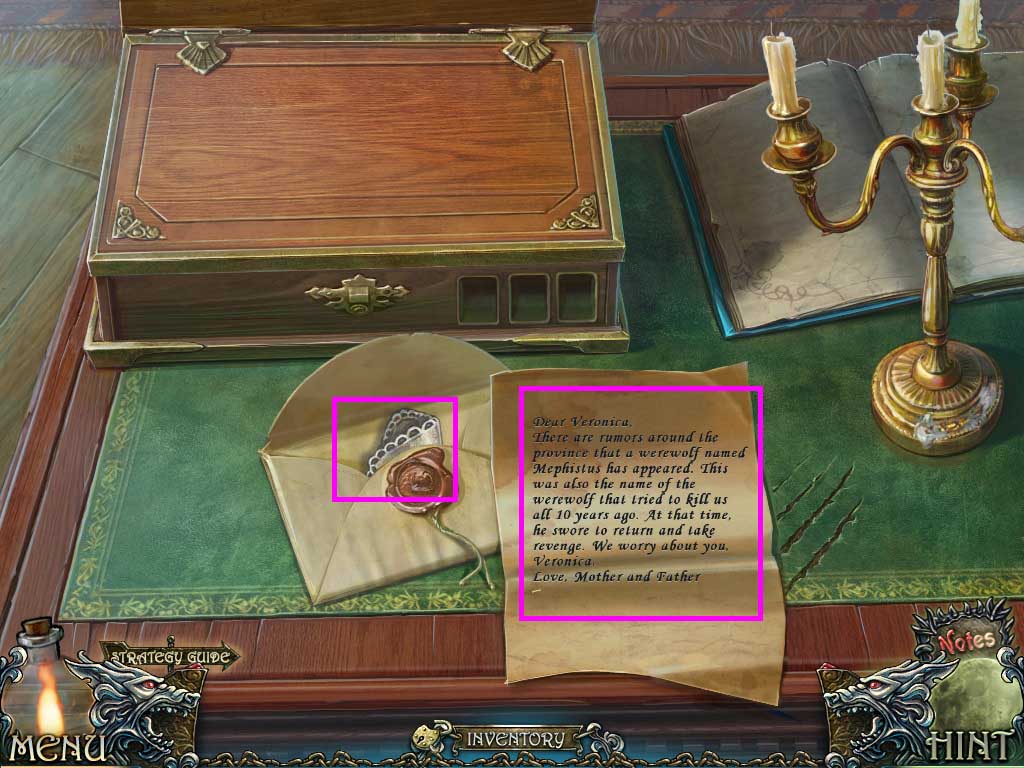
- Use the letter opener to open the letter.
- Collect the note.
- Collect the handkerchief.
- Click the statue.
- Clean the dust with the handkerchief.
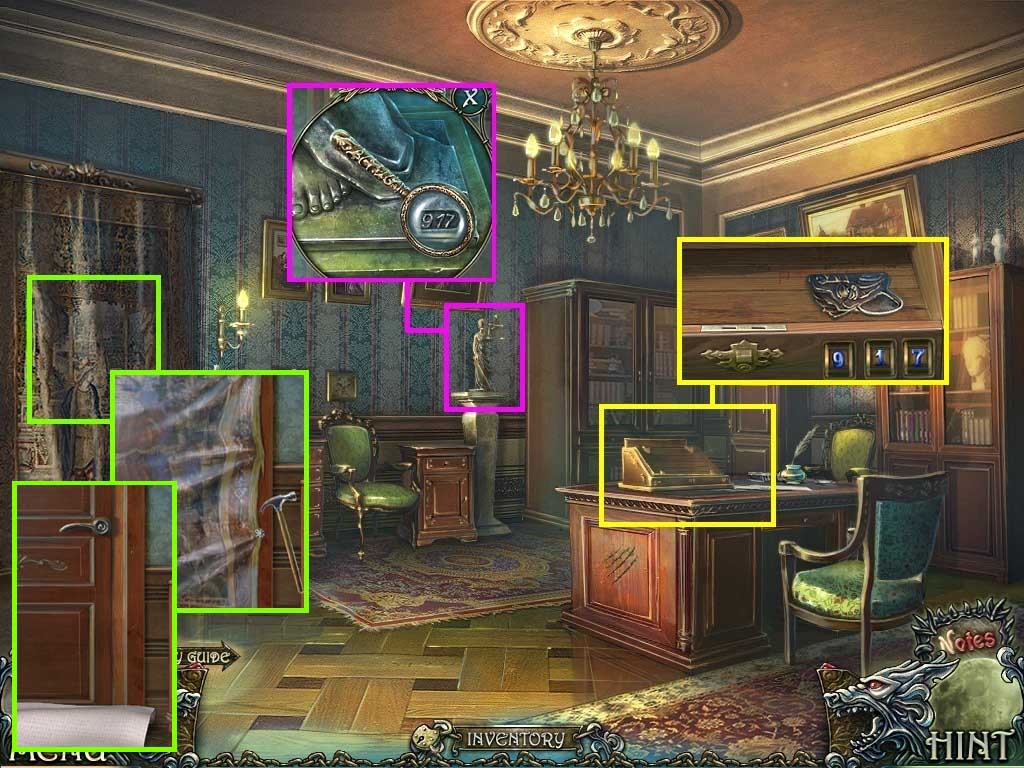
- Use the magnifying glass to get the code.
- Click the desk.
- Place the number wheels into the slots on the box.
- Enter the code: 9 – 1 – 7.
- Collect the wolf head.
- Click the tapestry.
- Use the hammer to remove the nails.
- Click the door and go through it.
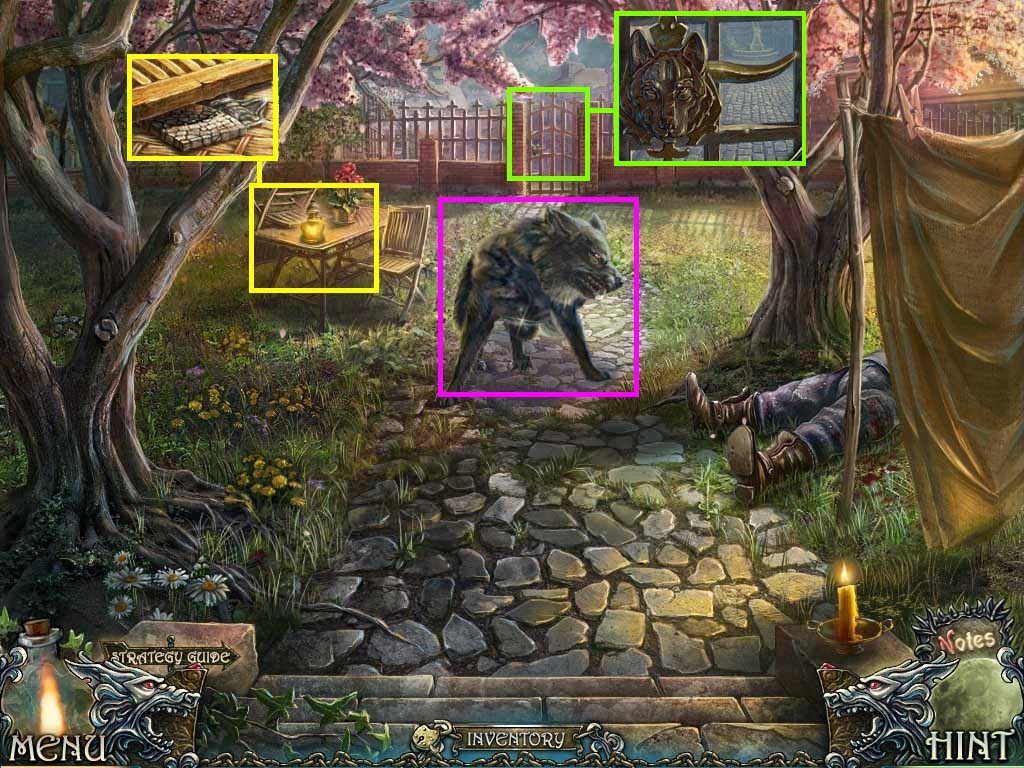
- Click the wolf.
- Click the table.
- Collect the mosaic piece.
- Collect the wolf head half.
- Click the gate.
- Insert the wolf head pieces into the grooves.
- Go into the gate.
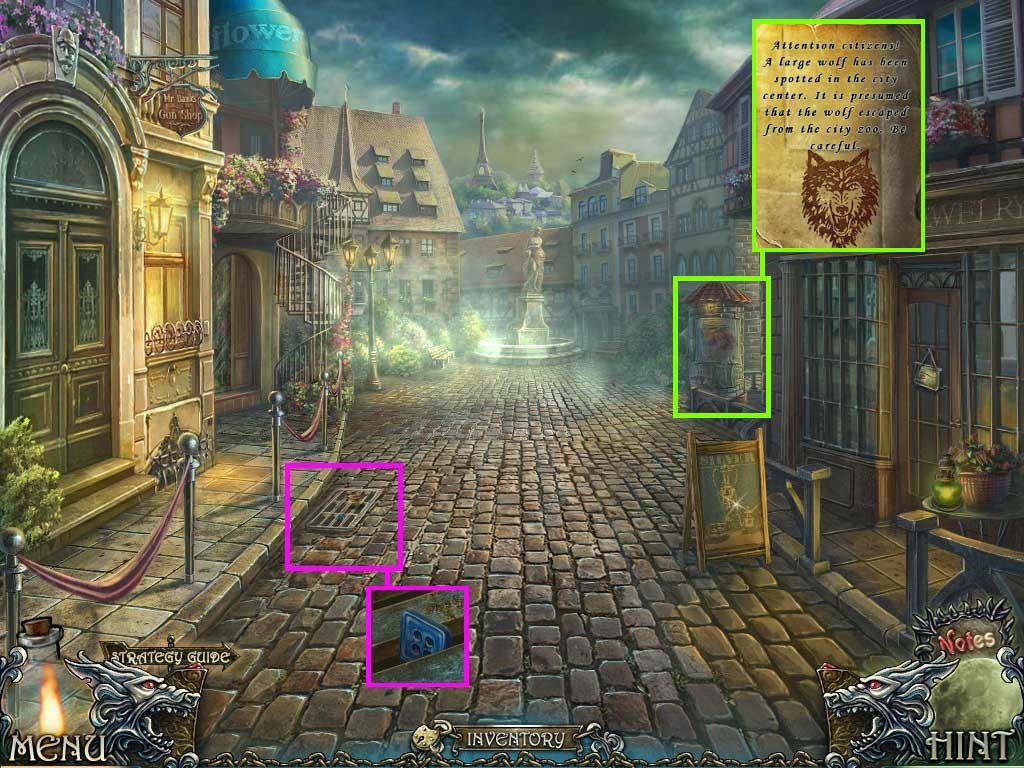
- Click the grate.
- Collect the button.
- Click the sign post.
- Collect the note.
- Go ahead and turn right to the funicular station.
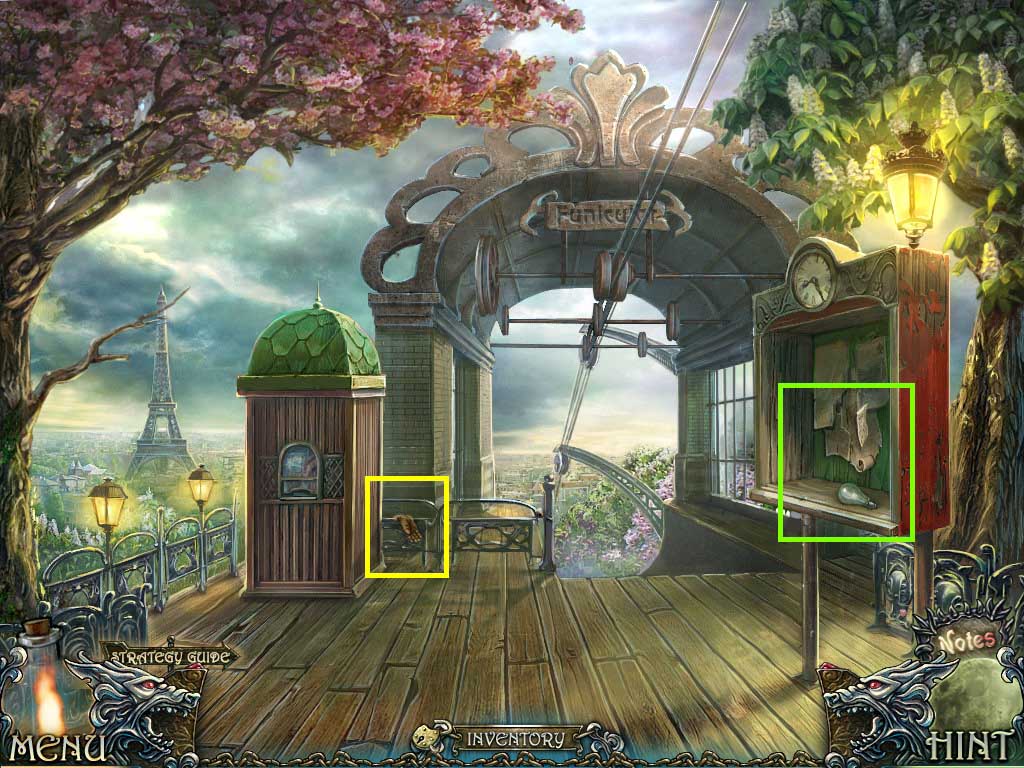
- Click the railing.
- Collect the glove.
- Click the board.
- Collect the bulb and the note.
- Walk down.
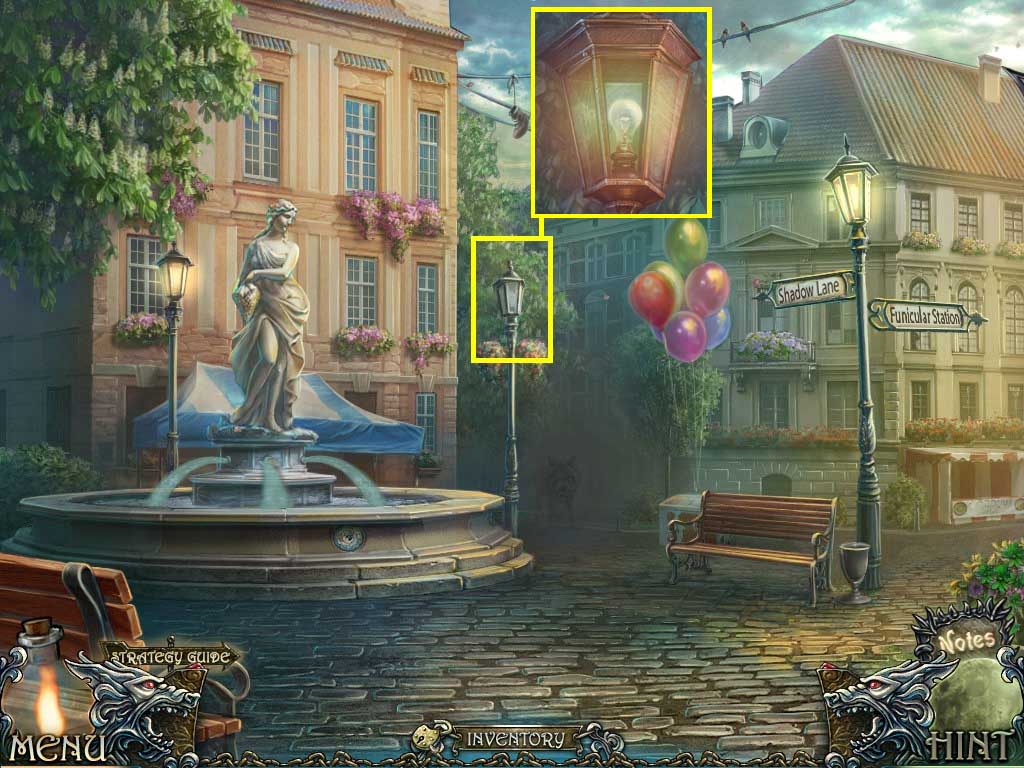
- Click the lamppost.
- Click the cover.
- Insert the bulb.
- Go forward.
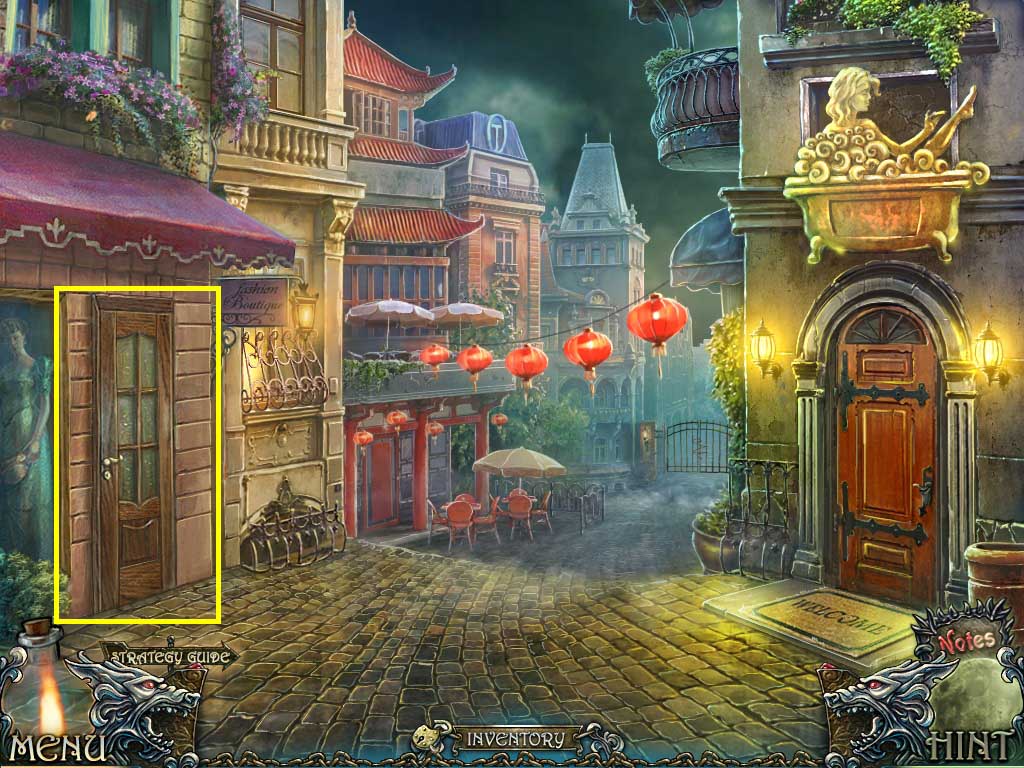
- Click the door.
- Enter through it into the boutique.
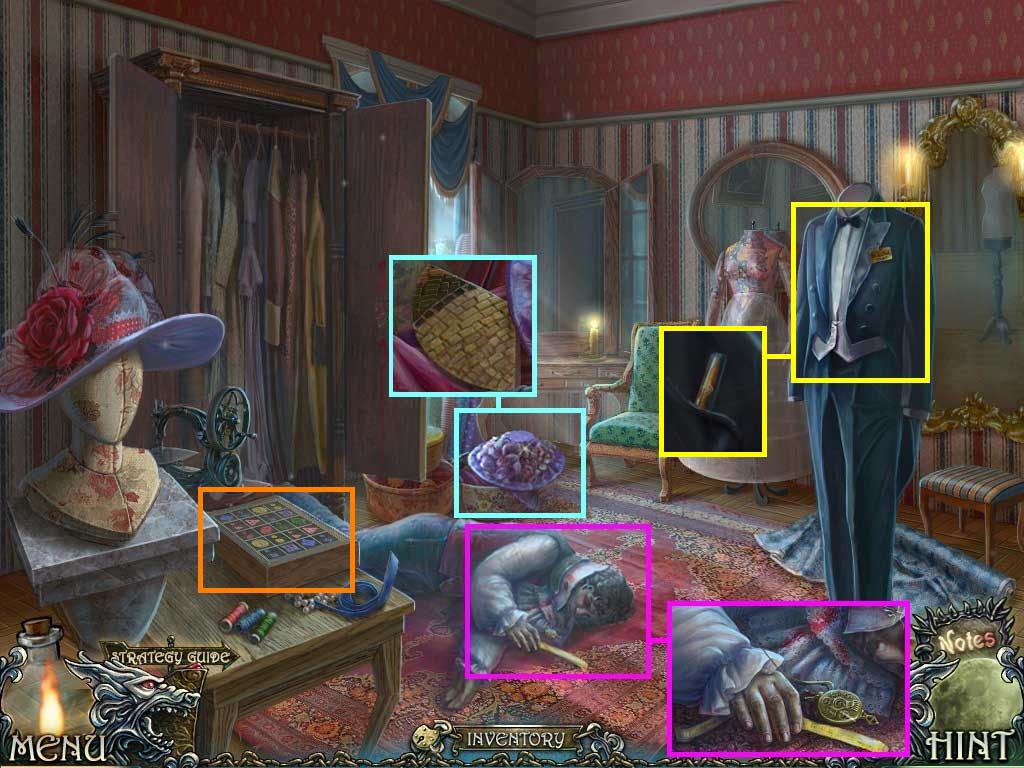
- Click the armoire.
- Click the man.
- Collect the medallion.
- Click the hat box; click the top.
- Collect the mosaic piece.
- Click the tux.
- Click the jacket; collect the cigar.
- Click the box.
- Insert the button into it to trigger a puzzle.

- Solve as shown above.
- Make sure that each row has unique shapes that do not duplicate.
- Collect the sewing pin.
- Walk down two times.
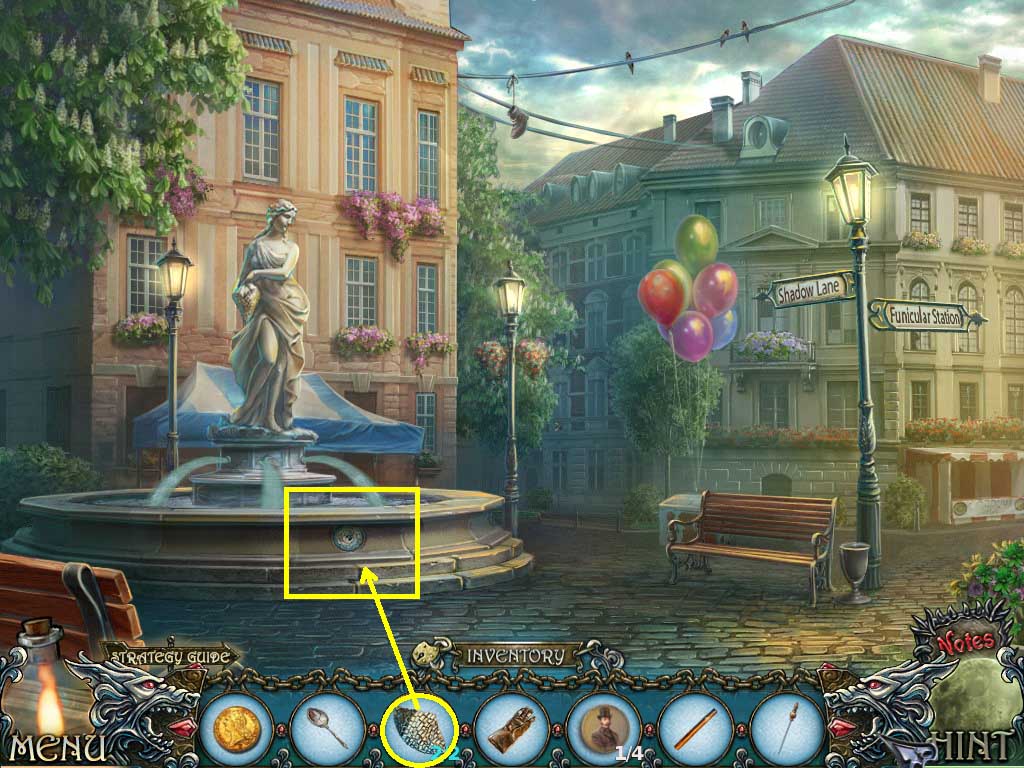
- Click the fountain.
- Insert the mosaic pieces to trigger a puzzle.
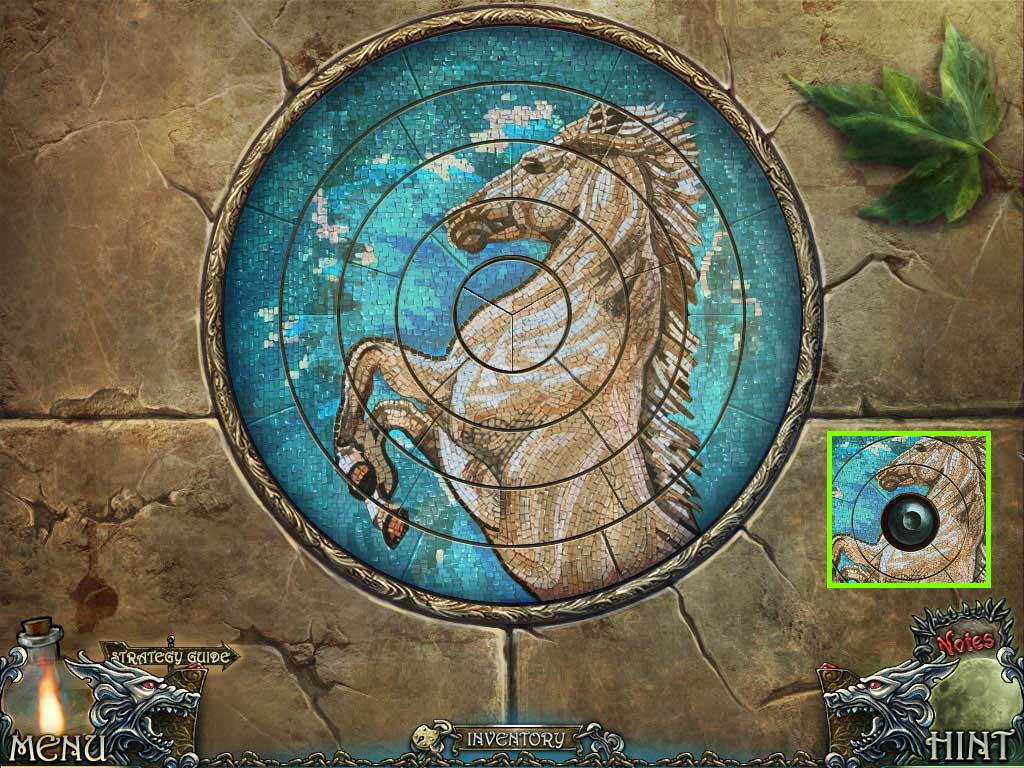
- Solve as shown above.
- Collect the glass eye.
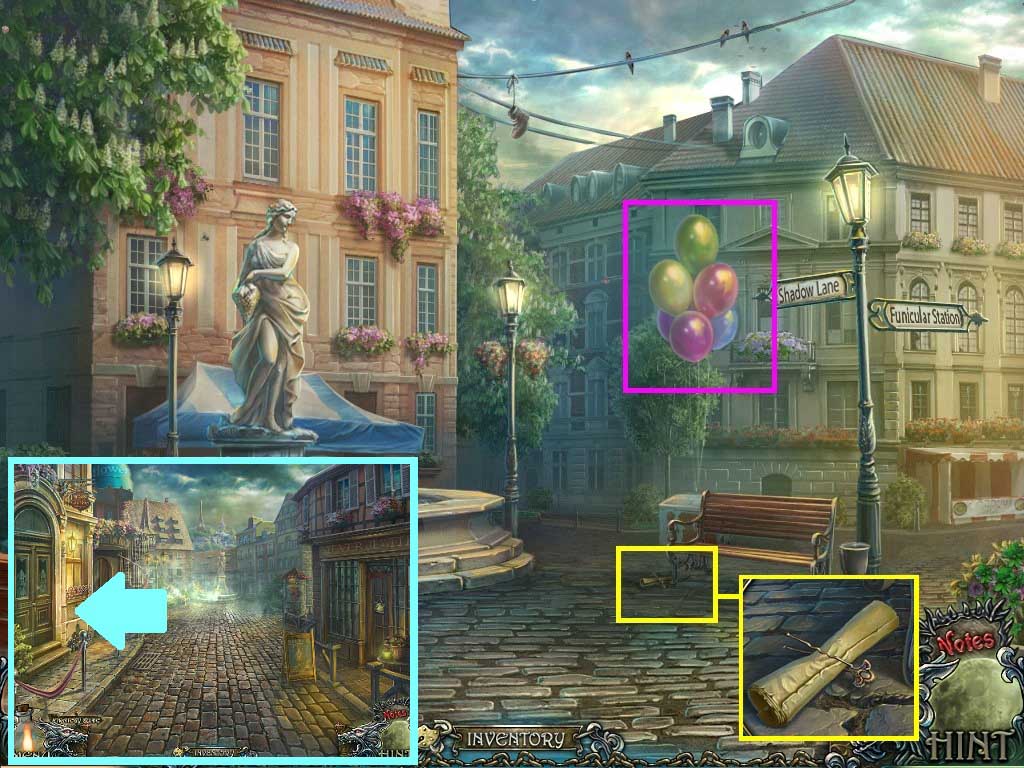
- Click the balloons.
- Pop them with the sewing pin.
- Click the ground; collect the pin and note.
- Walk down; click the door on the left and enter.

- Click Mr. Banks.
- Click the cigar box.
- Click the top.
- Place the cigar onto it to trigger a puzzle.
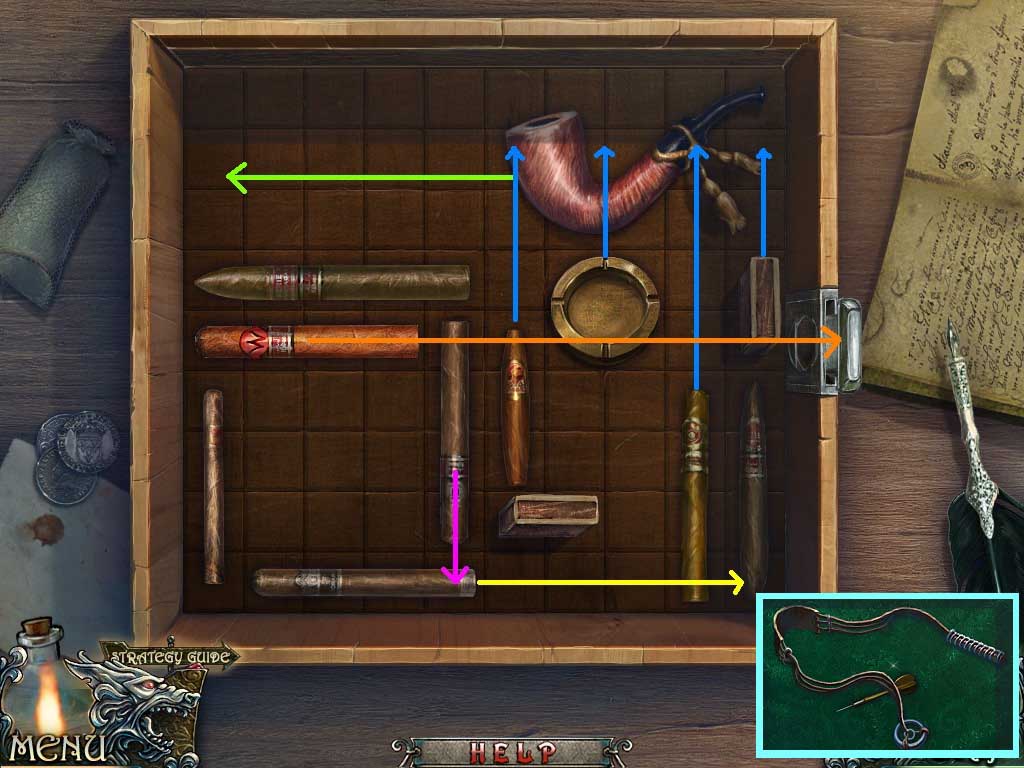
-
Solve the puzzle following this sequence of movement in the order shown below:
- 1. Green
- 2. Blue
- 3. Yellow
- 4. Pink
- 5. Orange
- Collect the dart and sling.
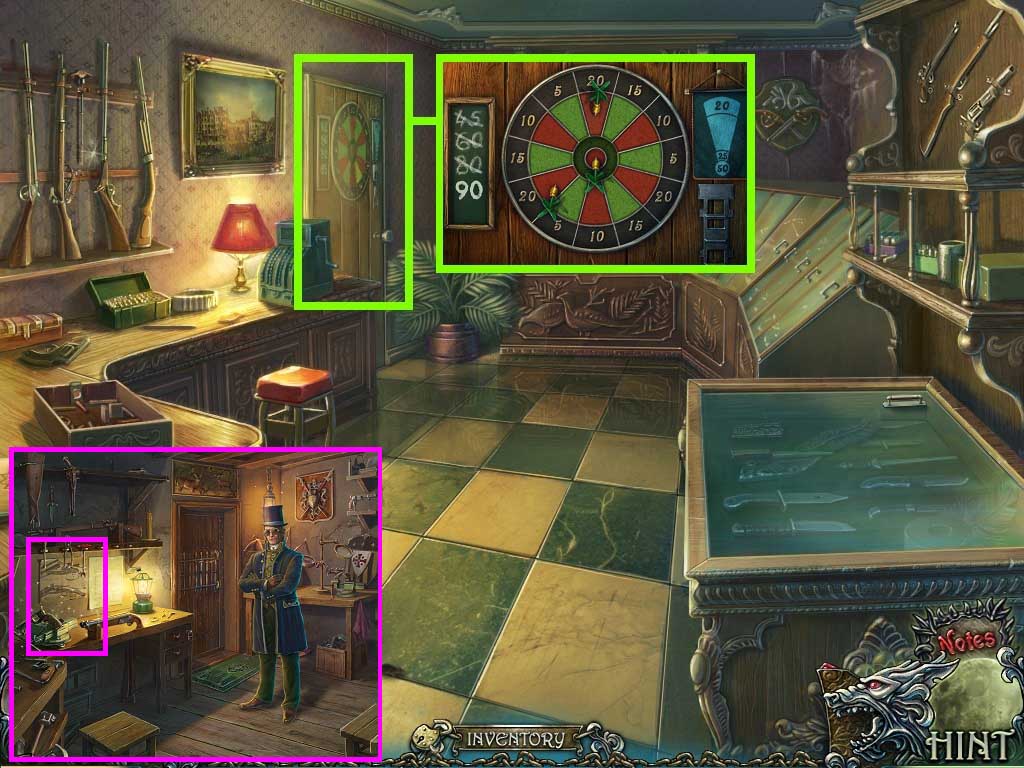
- Zoom into the door; insert the dart into the holder.
- A puzzle will trigger.
- Solve as shown above.
- Go into the door to enter Mr. Banks’ office.
- Click Mr. Banks.
- Click the hidden objects area.

- Find the listed objects.
- Collect the scheme.
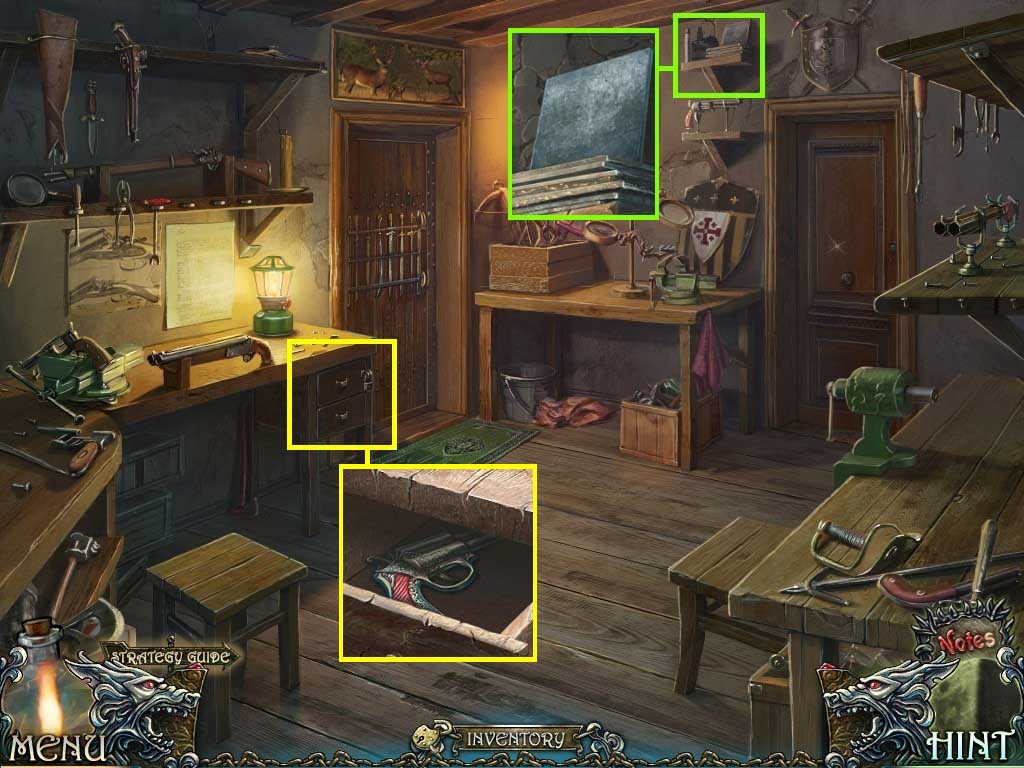
- Click the shelf.
- Collect the steel sheet.
- Click the desk drawer.
- Use the pin to open the lock.
- Open the drawer; collect the gun.
- Walk down.
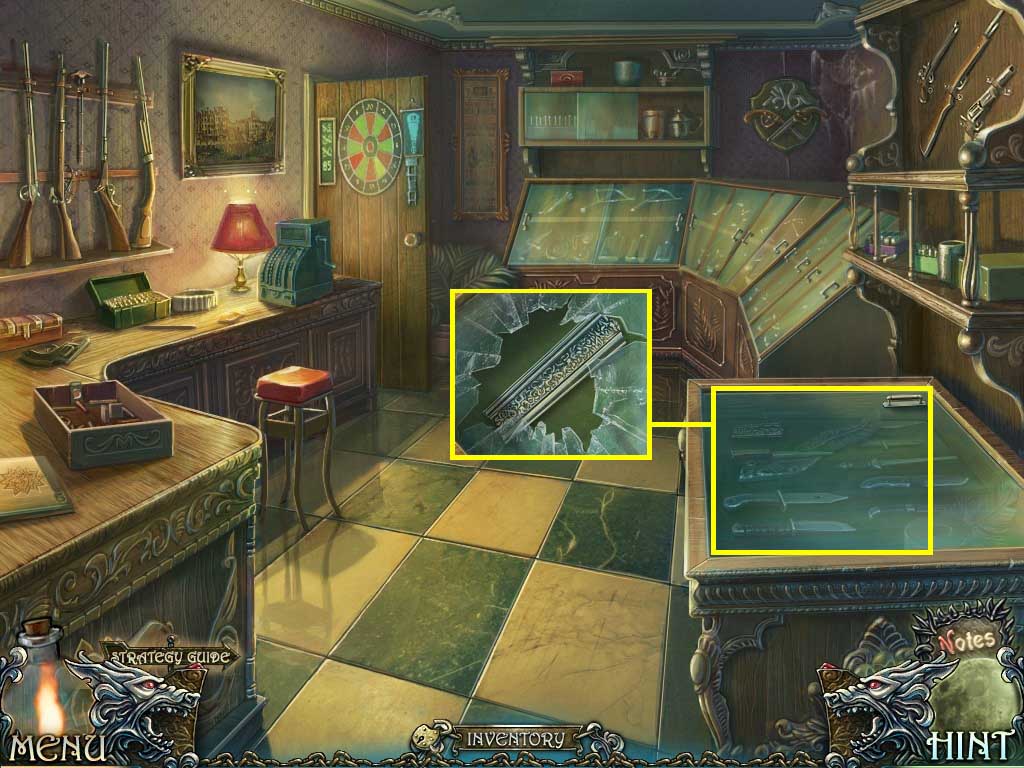
- Click the glass case.
- Use the gun to break it.
- Use the glove to collect the sword piece.
- Go into Banks’ office.
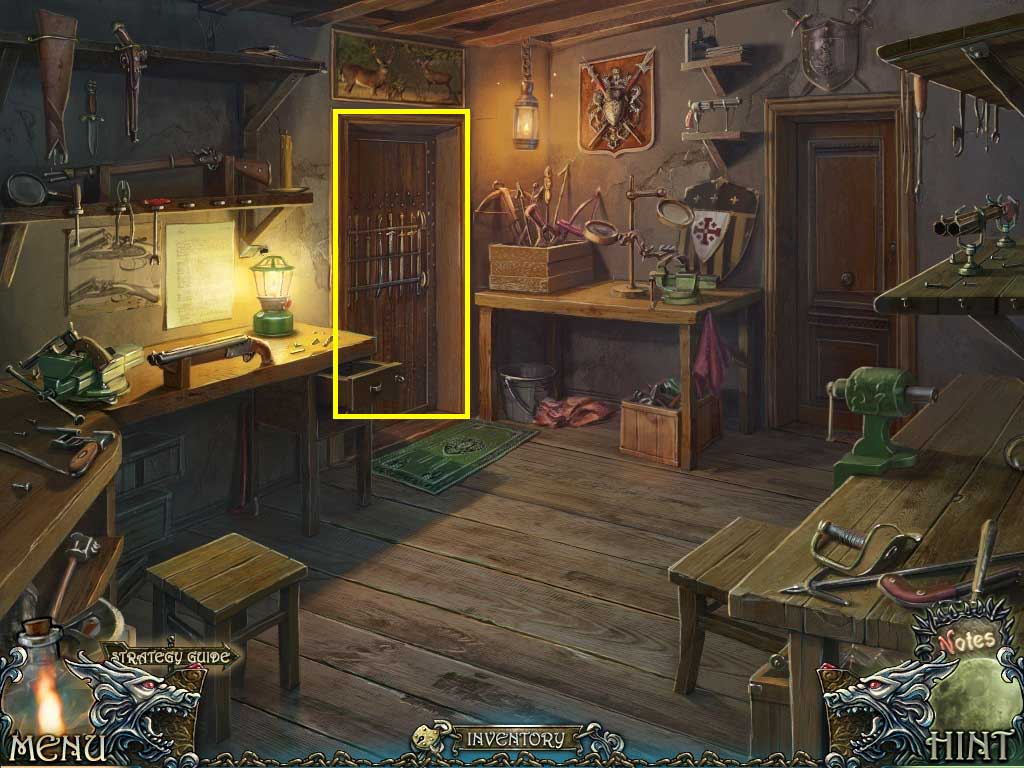
- Click the door.
- Insert the sword piece to trigger a puzzle.
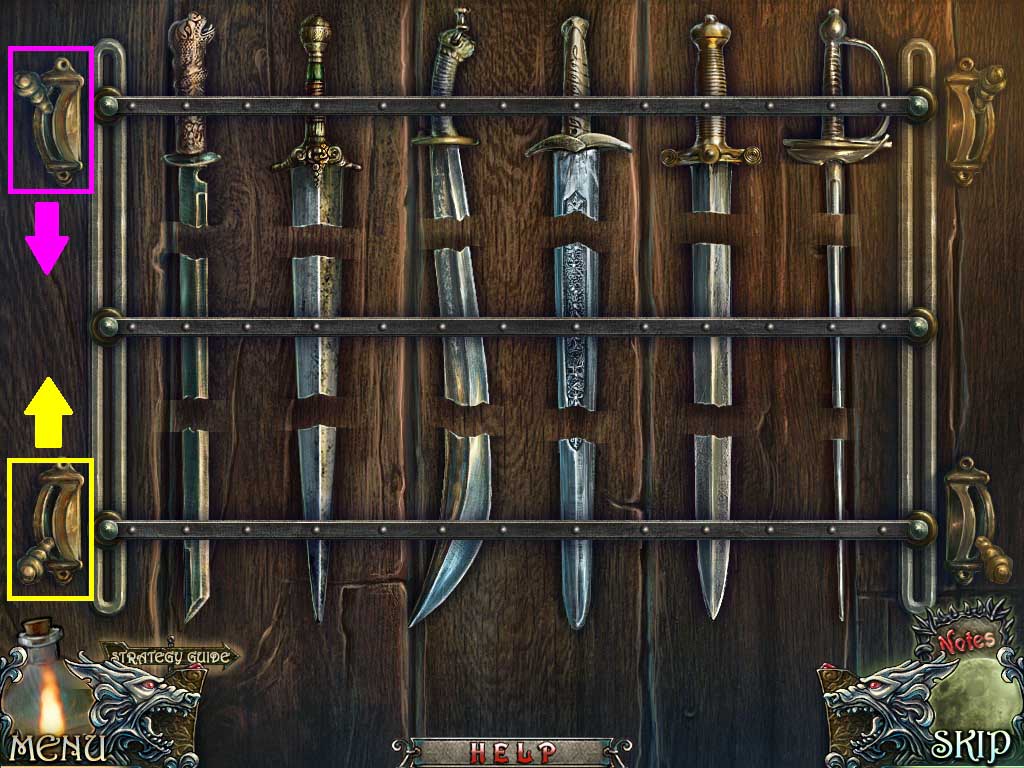
- Arrange the swords as shown above.
- Click the levers to open the door.
- Go through the door.